CUDA Quantum Open Beta Installation
Docker Image
Install the Docker Image
Docker images for all CUDA Quantum releases are available on the NGC Container Registry. The image for the latest version under development is built from source on our GitHub repository.
To download the latest version on the main branch of our GitHub repository, for example, use the command
docker pull ghcr.io/nvidia/cuda-quantum:latest
Use CUDA Quantum in a Terminal
The container can be run using the following command
docker run -it --name cuda-quantum <image_name>
replacing <image_name> with the name and tag of the image you downloaded.
This will give you terminal access to the created container, for example
user@host:~$ docker run -it --name cuda-quantum ghcr.io/nvidia/cuda-quantum:latest
To run a command as administrator (user "root"), use "sudo <command>".
See "man sudo_root" for details.

=========================
NVIDIA CUDA Quantum
=========================

Version: latest

Copyright (c) 2023 NVIDIA Corporation & Affiliates
All rights reserved.

cudaq@container:~$ ls examples/
cpp  python
Note
If you have NVIDIA GPUs available and NVIDIA Docker correctly configured,
you can add --gpus all to the docker run command to expose all available GPUs
to the container, or --gpus '"device=1"' to select a specific GPU device.
Unless you specify this flag, you will not be able to compile to the --target nvidia
target.
Note
If you would like a temporary container, pass --rm. This will delete your
container upon exit.
You can stop and exit the container by typing the command exit. If you did not specify
--rm, the container still exists as well as any changes you made in it. You can get back to it using
the command docker start -i cuda-quantum.
You can delete an existing container and any changes you made using docker rm -v cuda-quantum.
Use CUDA Quantum in VS Code
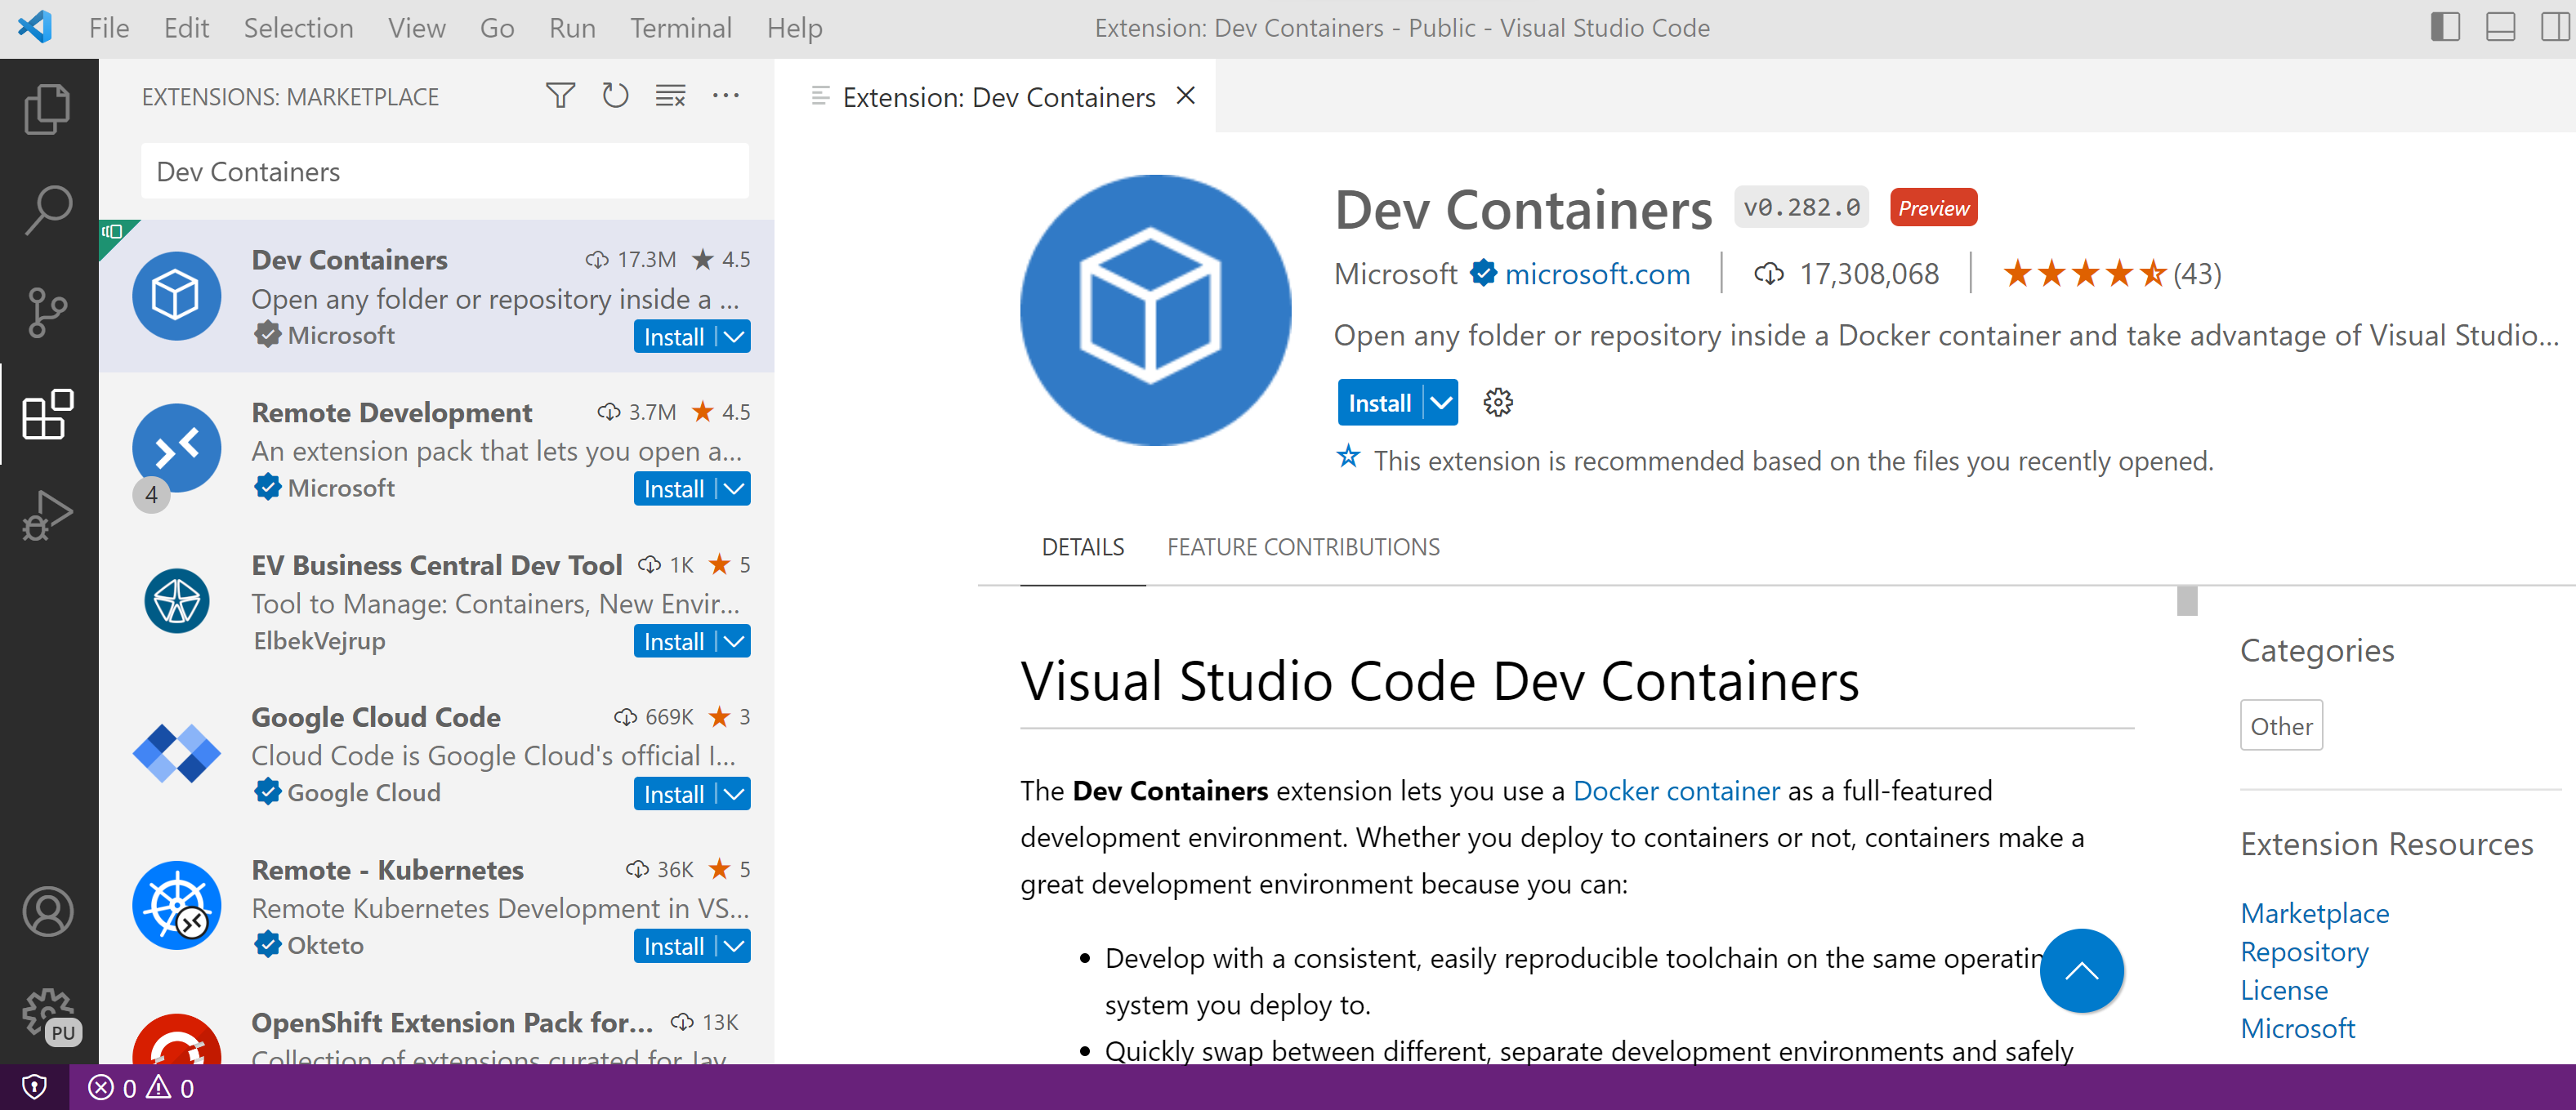
If you have VS Code installed, you can use it to work inside your container. To do so, install the Dev Containers extension:
Follow the steps above to start the container. Open VS Code and navigate to the Remote Explorer. You should see the running cuda-quantum development container listed there.
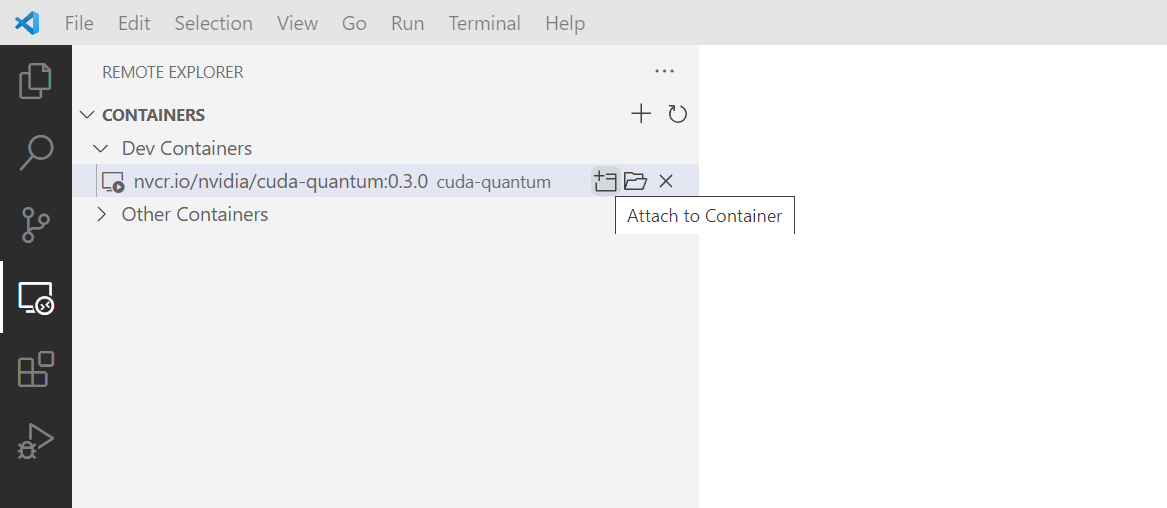
Click on Attach to Container. A new VS Code instance will open in that container. Open the /home/cudaq
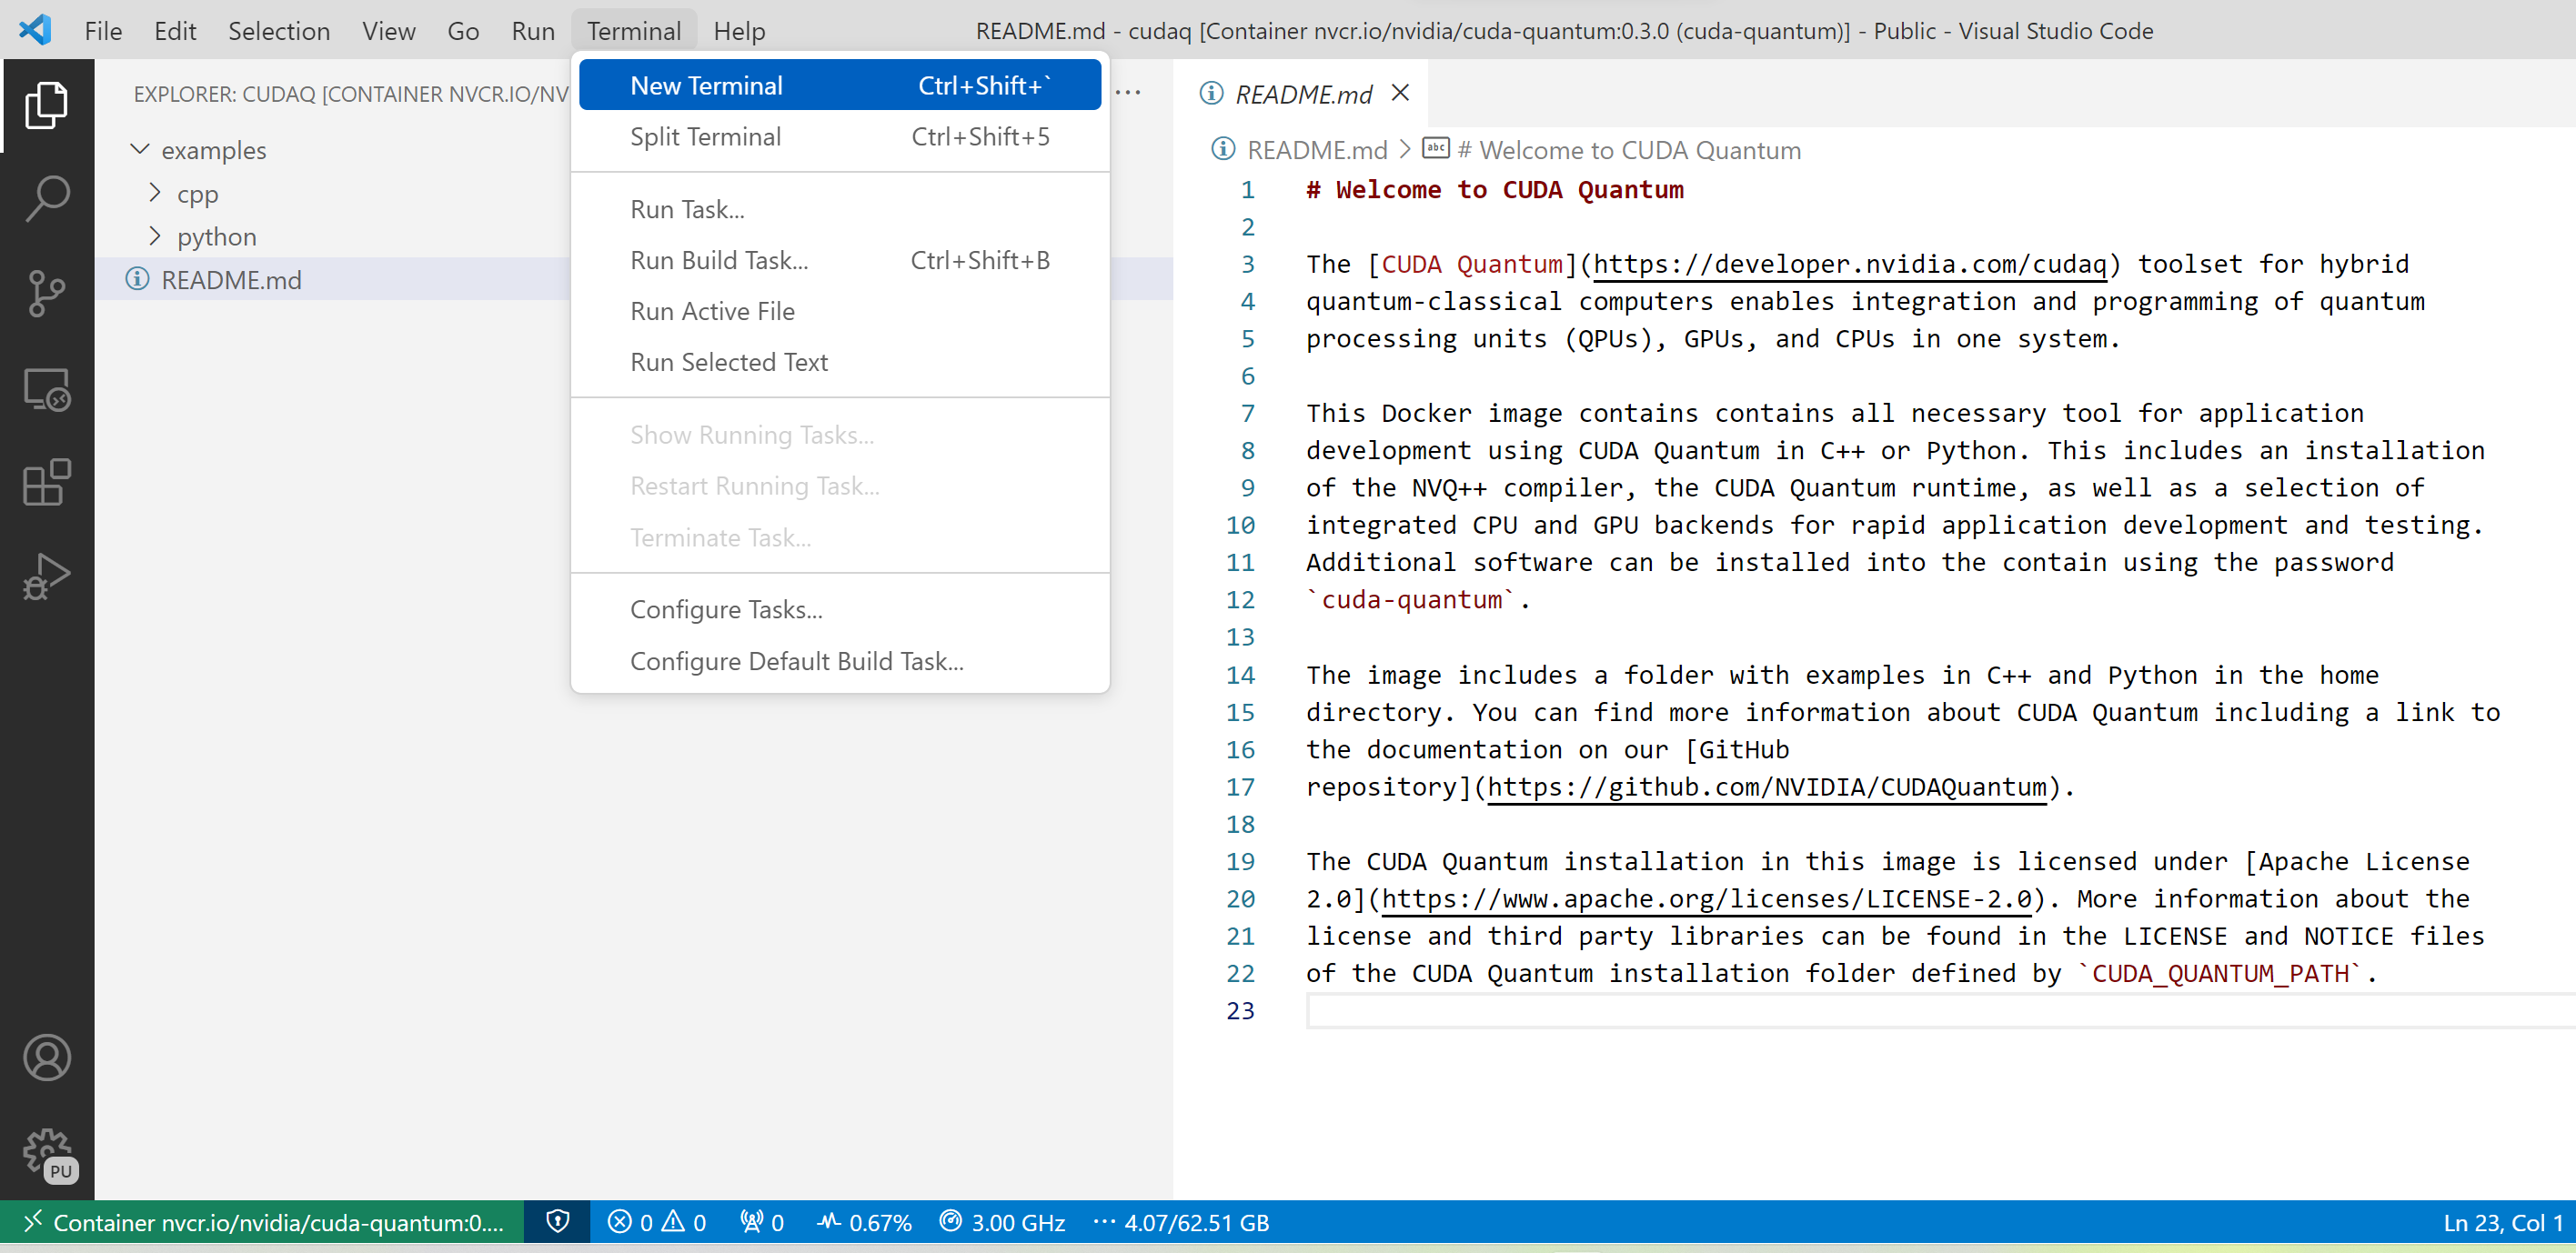
folder to see the README.md file and the CUDA Quantum examples that are included in the container. To run the examples,
open a terminal by going to the Terminal menu and select New Terminal.
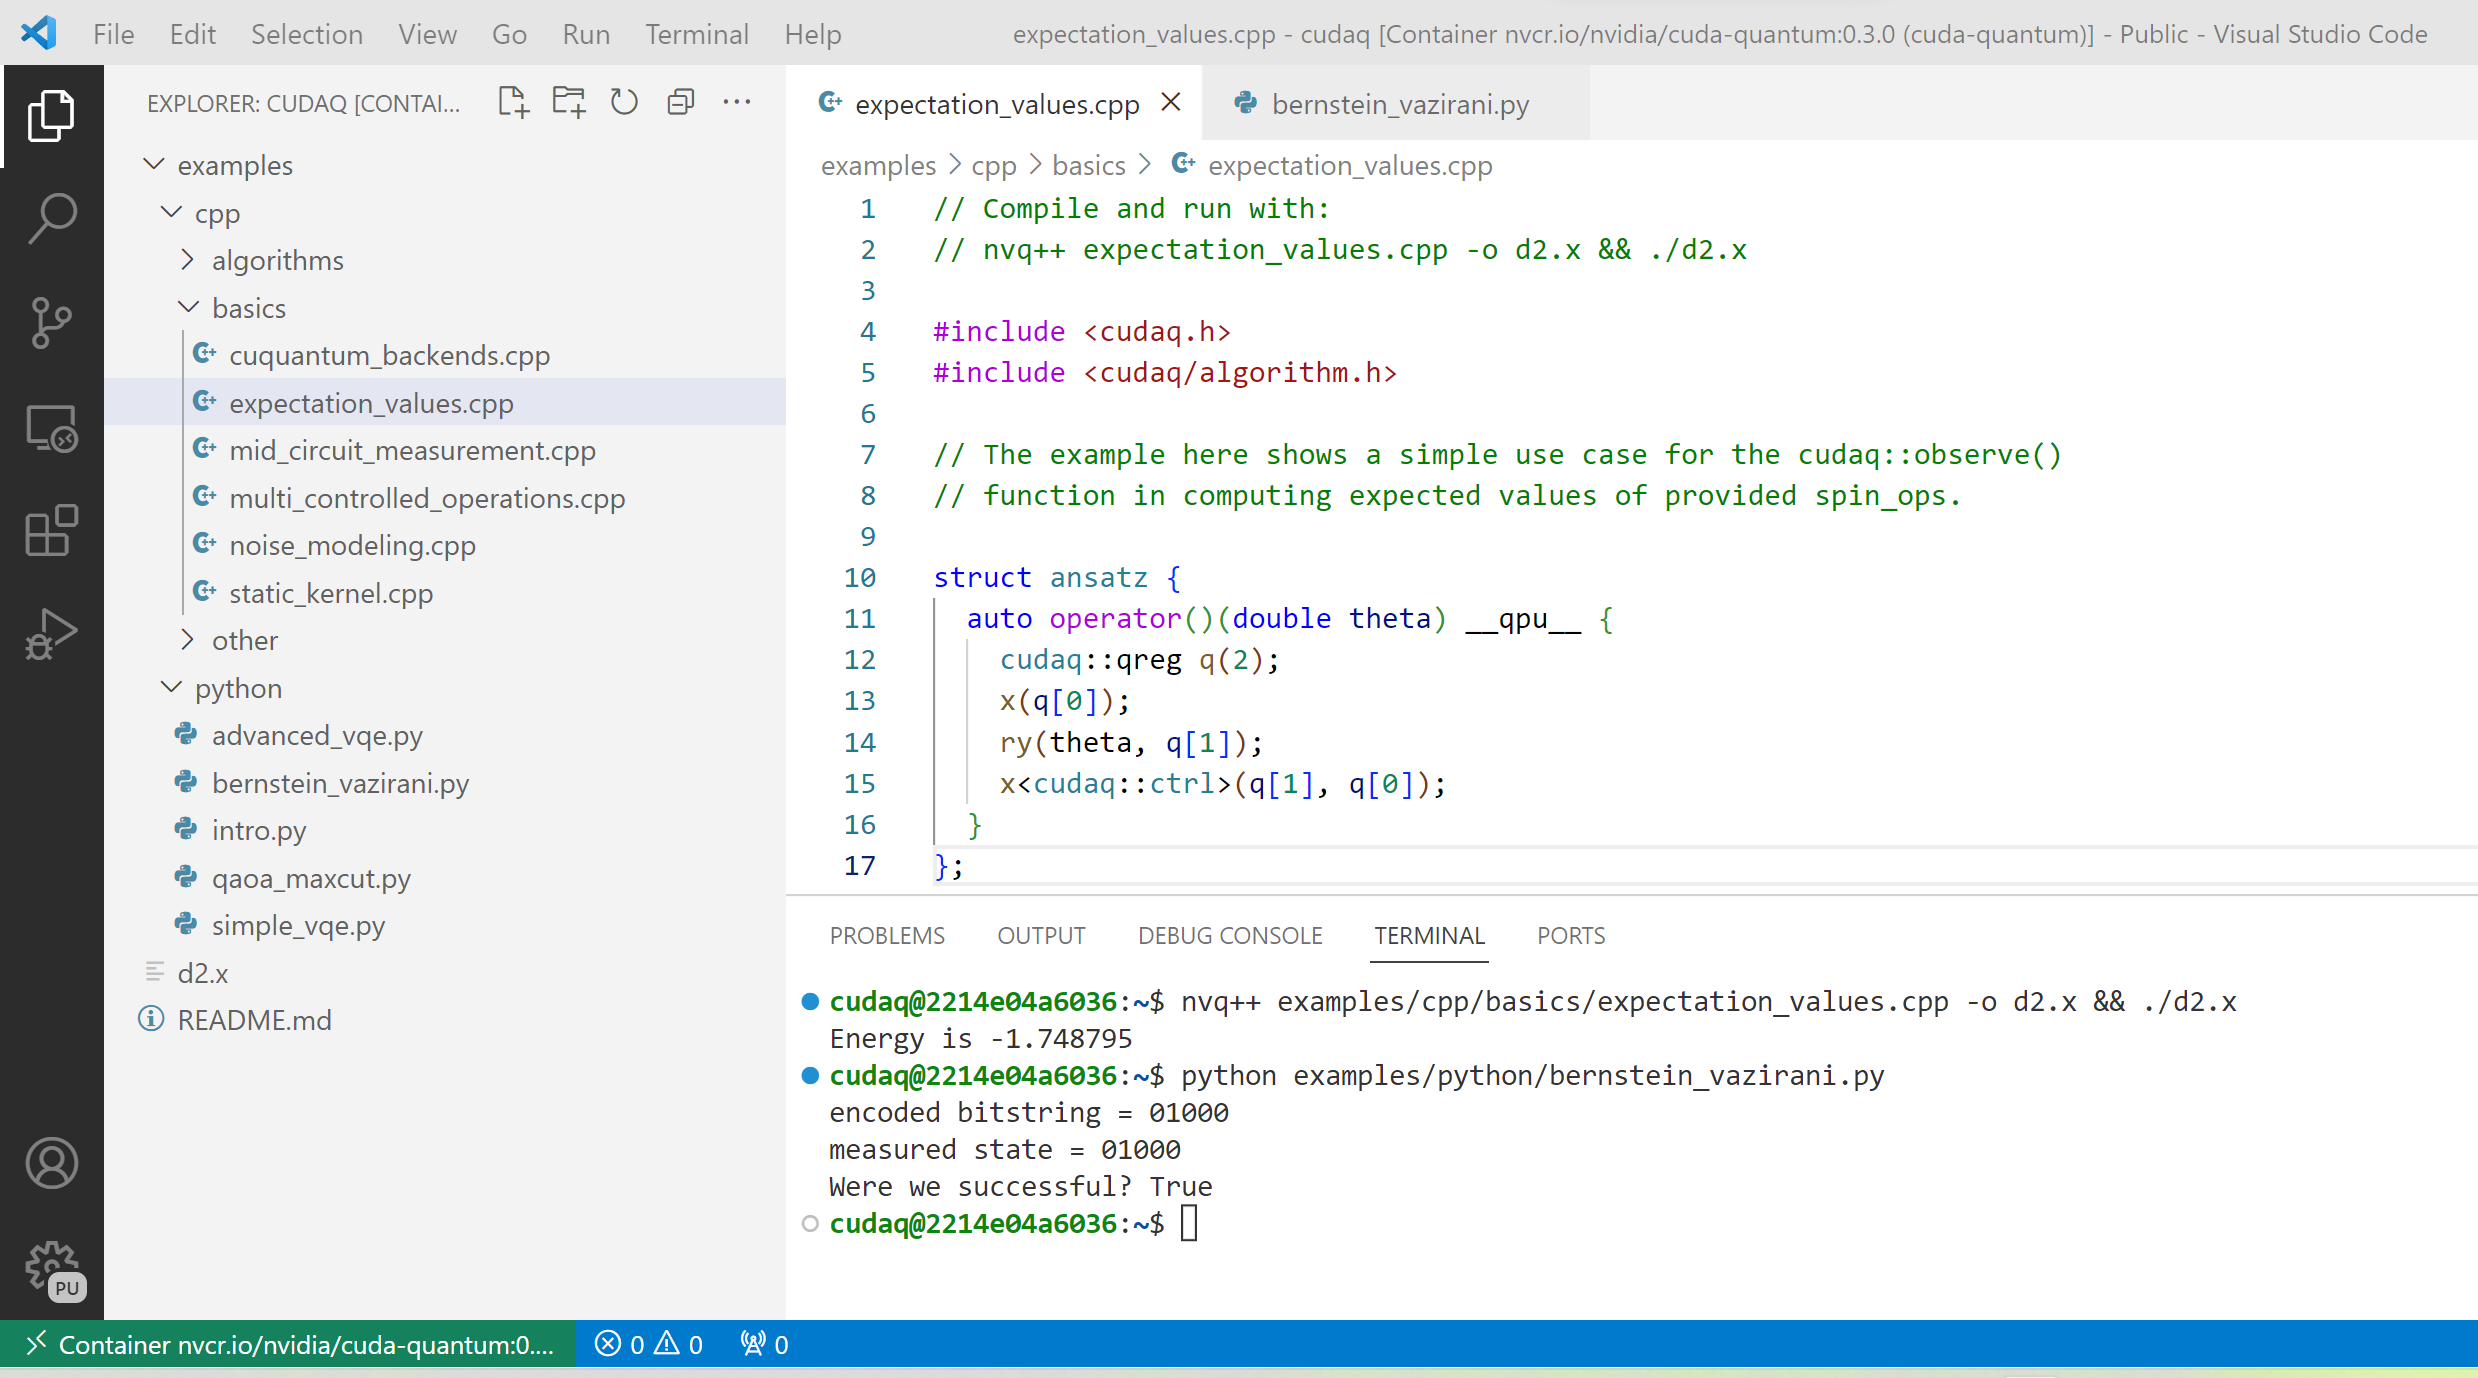
You can now compile and run the C++ examples using the nvq++ compiler, which is installed in your PATH,
or run the Python examples using the Python interpreter.
Note
VS Code extensions that you have installed locally, such as e.g. an extension for Jupyter notebooks, may not be automatically active in the container environment. You may need to install your preferred extension in the container environment for all of your development tools to be available.
Python wheels
CUDA Quantum Python wheels are available on [PyPI.org](https://pypi.org/project/cuda-quantum). The CUDA Quantum Python wheels contain the Python API and core components of CUDA Quantum. For more information about available packages and documentation, see CUDA Quantum Versions.
To install the latest release using pip, run
python3 -m pip install cuda-quantum
There are currently no source distributions available on PyPI, but you can download the source code for all releases here. For more information about building a CUDA Quantum Python wheel from source, see the README.
Build CUDA Quantum from Source
For more information about building CUDA Quantum from source, we refer to the CUDA Quantum GitHub repository.
Next Steps
With the CUDA Quantum Docker image installed and a container up and running, check out the Using CUDA Quantum page. To run the examples codes in the container, checkout the Compiling and Executing section here.
Once in the VS Code IDE or in the terminal for the container in headless mode, you’ll
notice there is an examples/ folder. These examples are provided to
get you started with CUDA Quantum and understanding the programming and execution model.
Start of by trying to compile a simple one, like examples/cpp/basics/static_kernel.cpp
nvq++ examples/cpp/basics/static_kernel.cpp
./a.out
If you have GPU support (e.g. you successfully provided --gpus to your docker
run command), try out the 30 qubit version of this example.
nvq++ examples/cpp/basics/cuquantum_backends.cpp --target nvidia
./a.out