Quick Start#
This guide walks through running a teleoperation session with an XR headset using CloudXR. By the end you will have the retargeting pipeline processing live hand/controller data and printing gripper commands to the terminal.
1. Check out code base (for examples)#
Clone the repository and enter the project directory:
git clone https://github.com/NVIDIA/IsaacTeleop.git
cd IsaacTeleop
As a quick start guide, we don’t need to build the code base from source. However, we still need to clone the repository for a couple quick samples to run.
2. Install the isaacteleop pip package#
In a new terminal, activate your preferred virtual or conda environment, then install the package from PyPI (or from a local wheel if you built from source):
# From PyPI
pip install 'isaacteleop[cloudxr,retargeters]~=1.0.0' --extra-index-url https://pypi.nvidia.com
Instead of installing the package from PyPI, you can build from source and install the local wheel. See Build from Source for more details.
ARM64 / aarch64 only (e.g. NVIDIA DGX Spark)
PyPI does not publish pre-built nlopt wheels for ARM64, so the retargeters extra cannot
be installed directly from PyPI
(see issue #452). Follow the
aarch64 nlopt wheel build steps from the build-from-source guide
first, then install isaacteleop with an additional --find-links:
pip install 'isaacteleop[cloudxr,retargeters]~=1.0.0' \
    --extra-index-url https://pypi.nvidia.com \
    --find-links=/tmp/nlopt-wheels/
3. Configure CloudXR (optional)#
The teleop examples in this guide auto-launch the CloudXR runtime and its WSS
proxy for you through CloudXRLauncher when they connect — you do not
need to start the runtime in a separate terminal or source any environment file.
The first launch downloads the CloudXR Web Client SDK and asks you to review and
accept the EULA on the terminal; answer the prompt once and the acceptance is
remembered for subsequent runs.
The CloudXR runtime uses the auto-webrtc device profile by default
(Pico & Quest). For Apple Vision Pro it defaults to auto-native. To
override settings, write a KEY=value env file and pass it to the example
with --cloudxr-env-config:
echo 'NV_DEVICE_PROFILE=auto-native' > custom.env
python examples/teleop/python/gripper_retargeting_example_simple.py \
      --cloudxr-env-config ./custom.env
The teleop examples under examples/teleop/python/ all register CloudXR’s
launcher arguments through CloudXRLauncher.add_launcher_arguments(), so
the same --cloudxr-env-config flag is available on each of them. (The ROS 2
example takes the equivalent cloudxr_env_config ROS parameter instead.)
To inspect the resolved settings after startup:
cat ~/.cloudxr/run/cloudxr.env
Note
If you prefer to run the runtime yourself in its own terminal — e.g. to keep
the headset connection alive across example restarts, or to use launch modes
like --host-client and --setup-oob — see
Dedicated CloudXR Runtime.
Variable |
Default |
Description |
Values |
|---|---|---|---|
|
|
Device profile |
|
|
|
Push device overseer for hand tracking |
|
|
|
File-based logging (disable to print to console) |
|
4. Whitelist ports for Firewall#
CloudXR requires certain network ports to be open. Depending on your firewall configuration, you might need to whitelist them manually.
Meta Quest and Pico headsets
For Quest and Pico headsets (web client), at the minimum, you need to whitelist the ports for the CloudXR runtime and wss proxy:
sudo ufw allow 47998/udp
sudo ufw allow 49100,48322/tcp
If you are running the web client from source (dev server), open both ports:
sudo ufw allow 8080,8443/tcp
Vision Pro client
For Vision Pro client, you need to whitelist the ports for the CloudXR runtime and wss proxy:
sudo ufw allow 48010,48322/tcp
sudo ufw allow 47998:48000,48005,48008,48012/udp
Please see the CloudXR network setup for more details for other network configurations (such as running the CloudXR runtime and wss proxy in containerized environment; or using Vision Pro client).
5. Connect an XR headset#
Meta Quest, PICO headset, or desktop browser
No physical headset required for a quick test: open https://nvidia.github.io/IsaacTeleop/client in a desktop browser — IWER (Immersive Web Emulator Runtime) loads automatically and emulates a Meta Quest 3 headset.
For a real headset, open the same URL in your Meta Quest or PICO browser.
Important
If using a physical headset, make sure it is updated to the latest firmware before connecting. Older firmware may ship an outdated WebXR runtime that fails to connect or streams with reduced functionality.
Note
Out of the box, Quest headsets stream at 72 FPS and 25 Mbps (Pico 4 Ultra at 90 FPS and 100 Mbps). You can raise both under Advanced settings in the control panel, up to 120 FPS and 200 Mbps, but on a typical 5 GHz Wi-Fi link the higher bitrates saturate the connection and you get reprojection judder within a few minutes. The defaults are the values that held stable over long sessions in our testing.
The client remembers your settings between sessions. A saved profile other than
Custom picks up the current recommended values on the next load, so updated
defaults reach you without clearing browser storage. Switch the profile to
Custom if you want your manual values to stick.
Note
If GitHub Pages is unreachable (corporate network, air-gapped machine), you can serve the web
client locally from the CloudXR proxy and open https://<your-ip>:48322/client/ instead of
the GitHub Pages URL. Port 48322 is already whitelisted in step
4. Whitelist ports for Firewall. See Out-of-Band Teleop Control for how to serve the
client from the proxy.
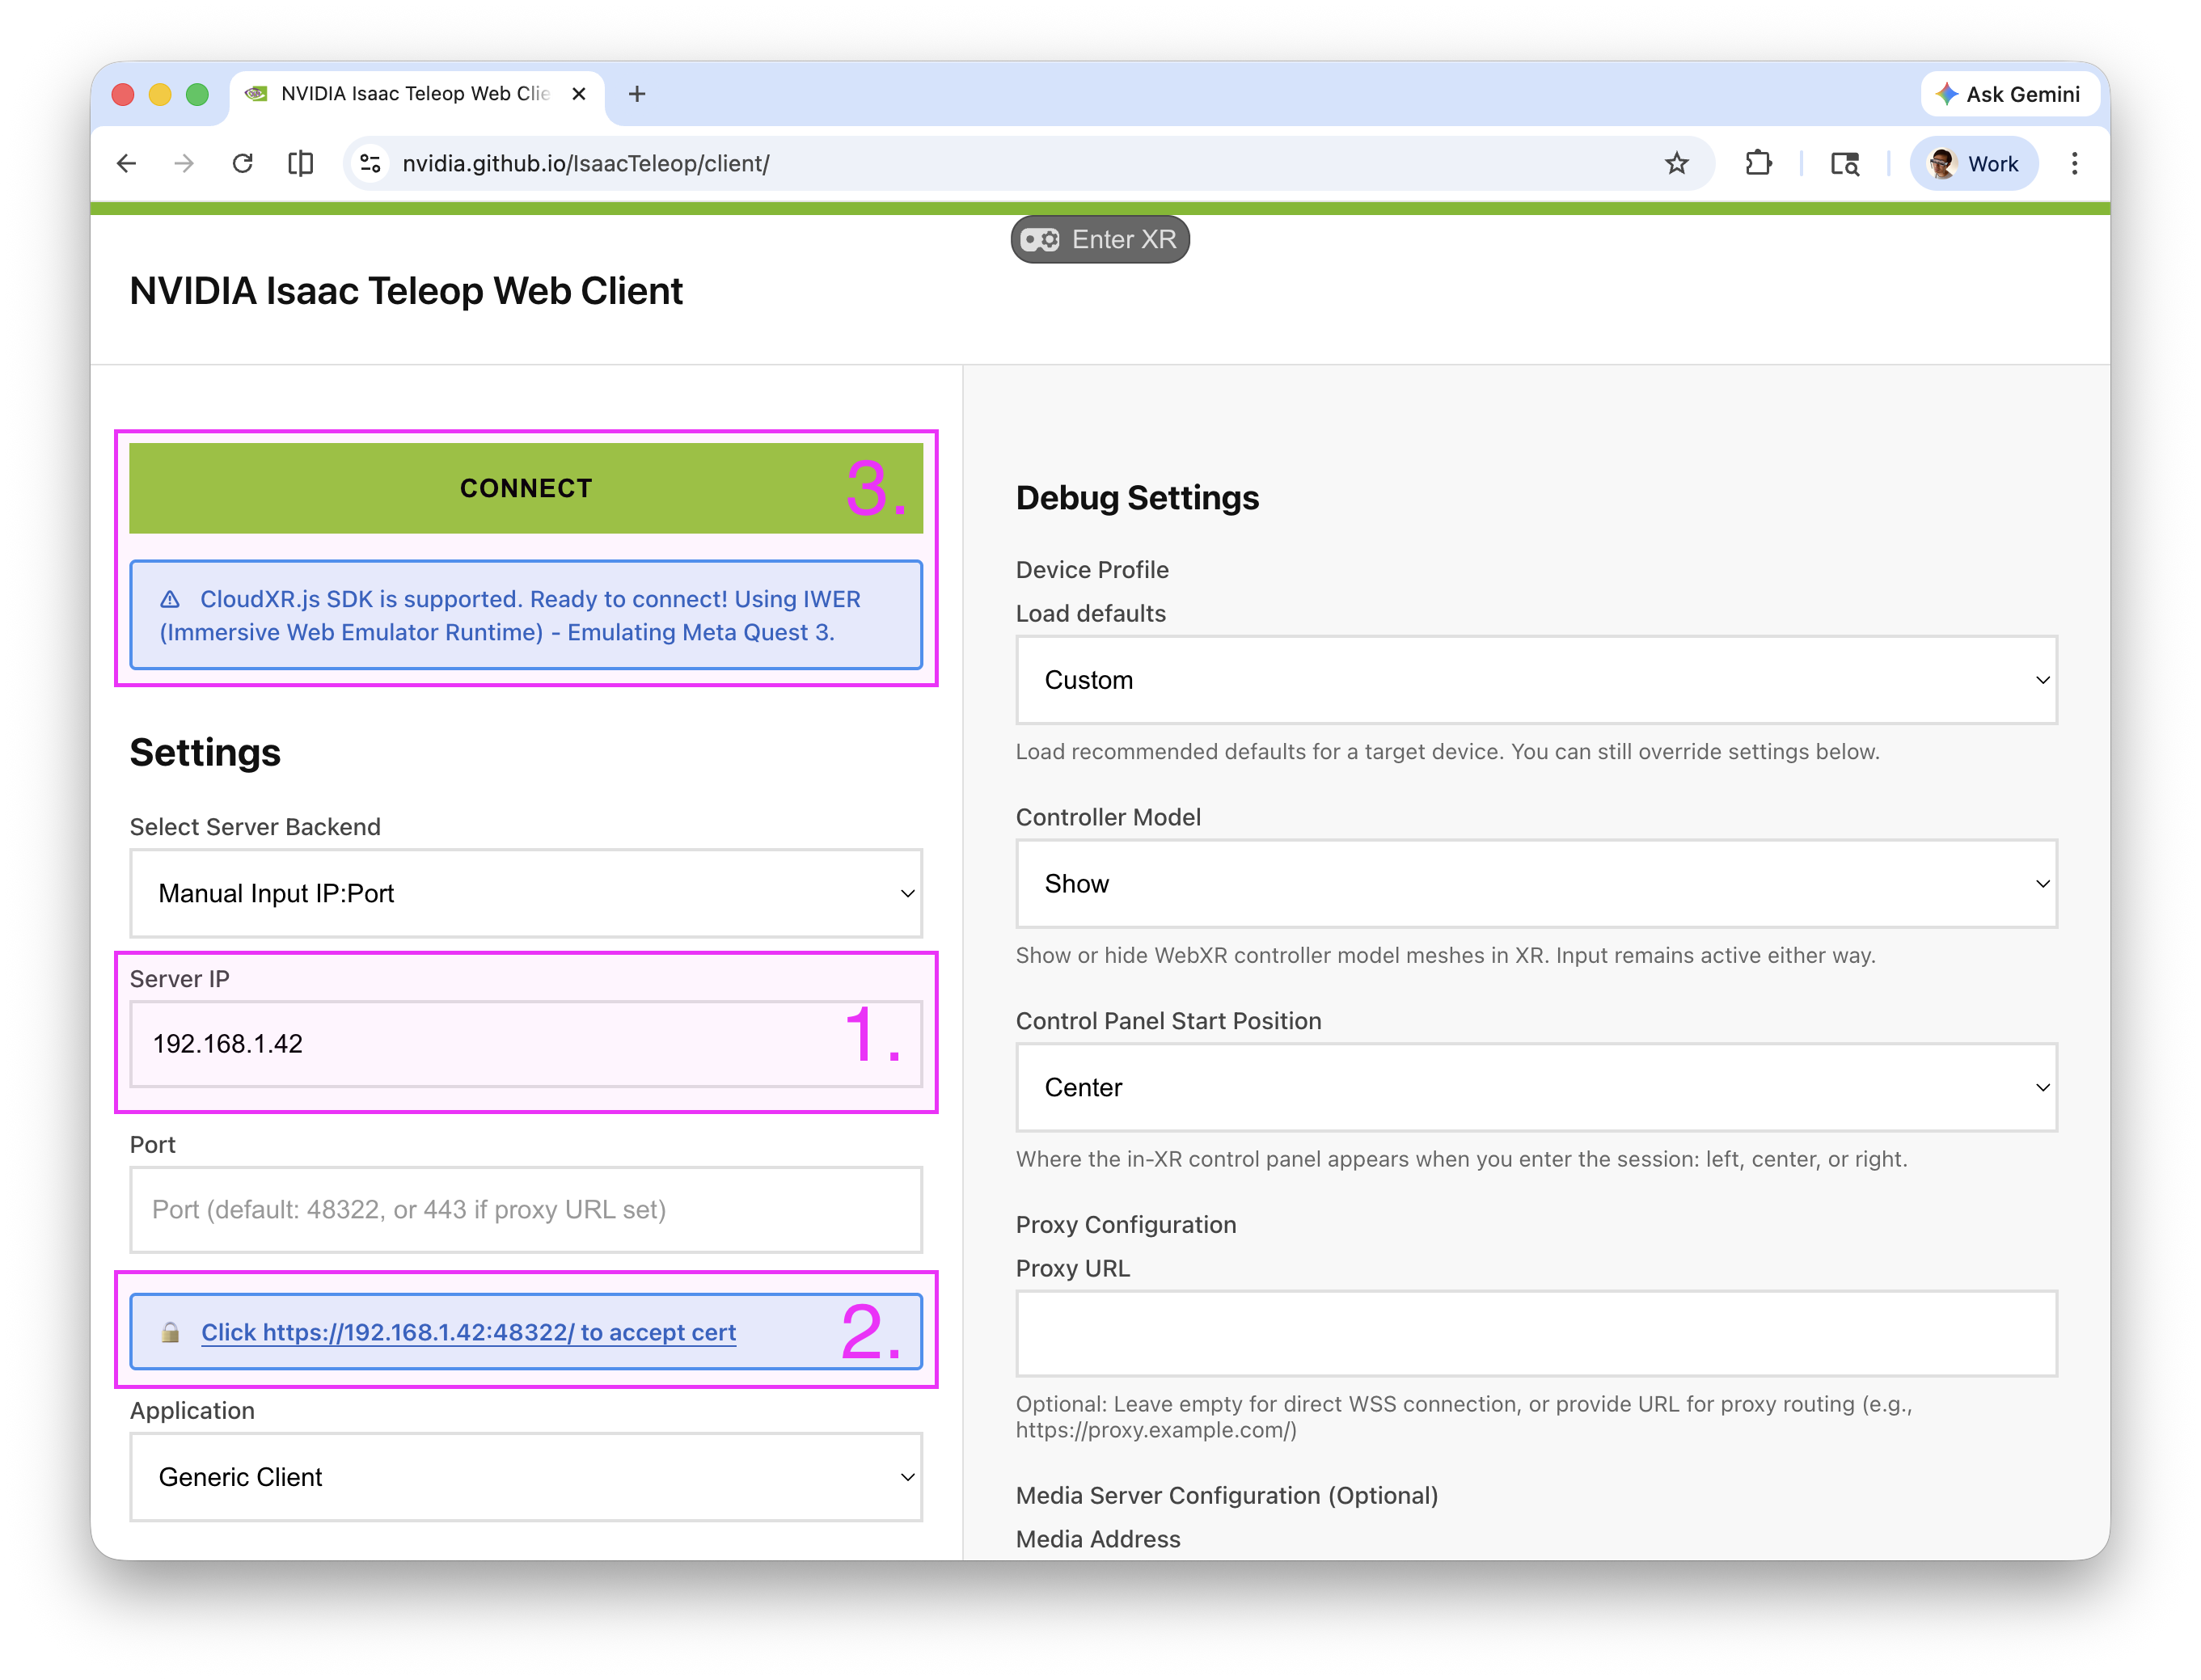
Figure: CloudXR web client usage instruction#

Figure: Browser privacy warning for self-signed certificate#
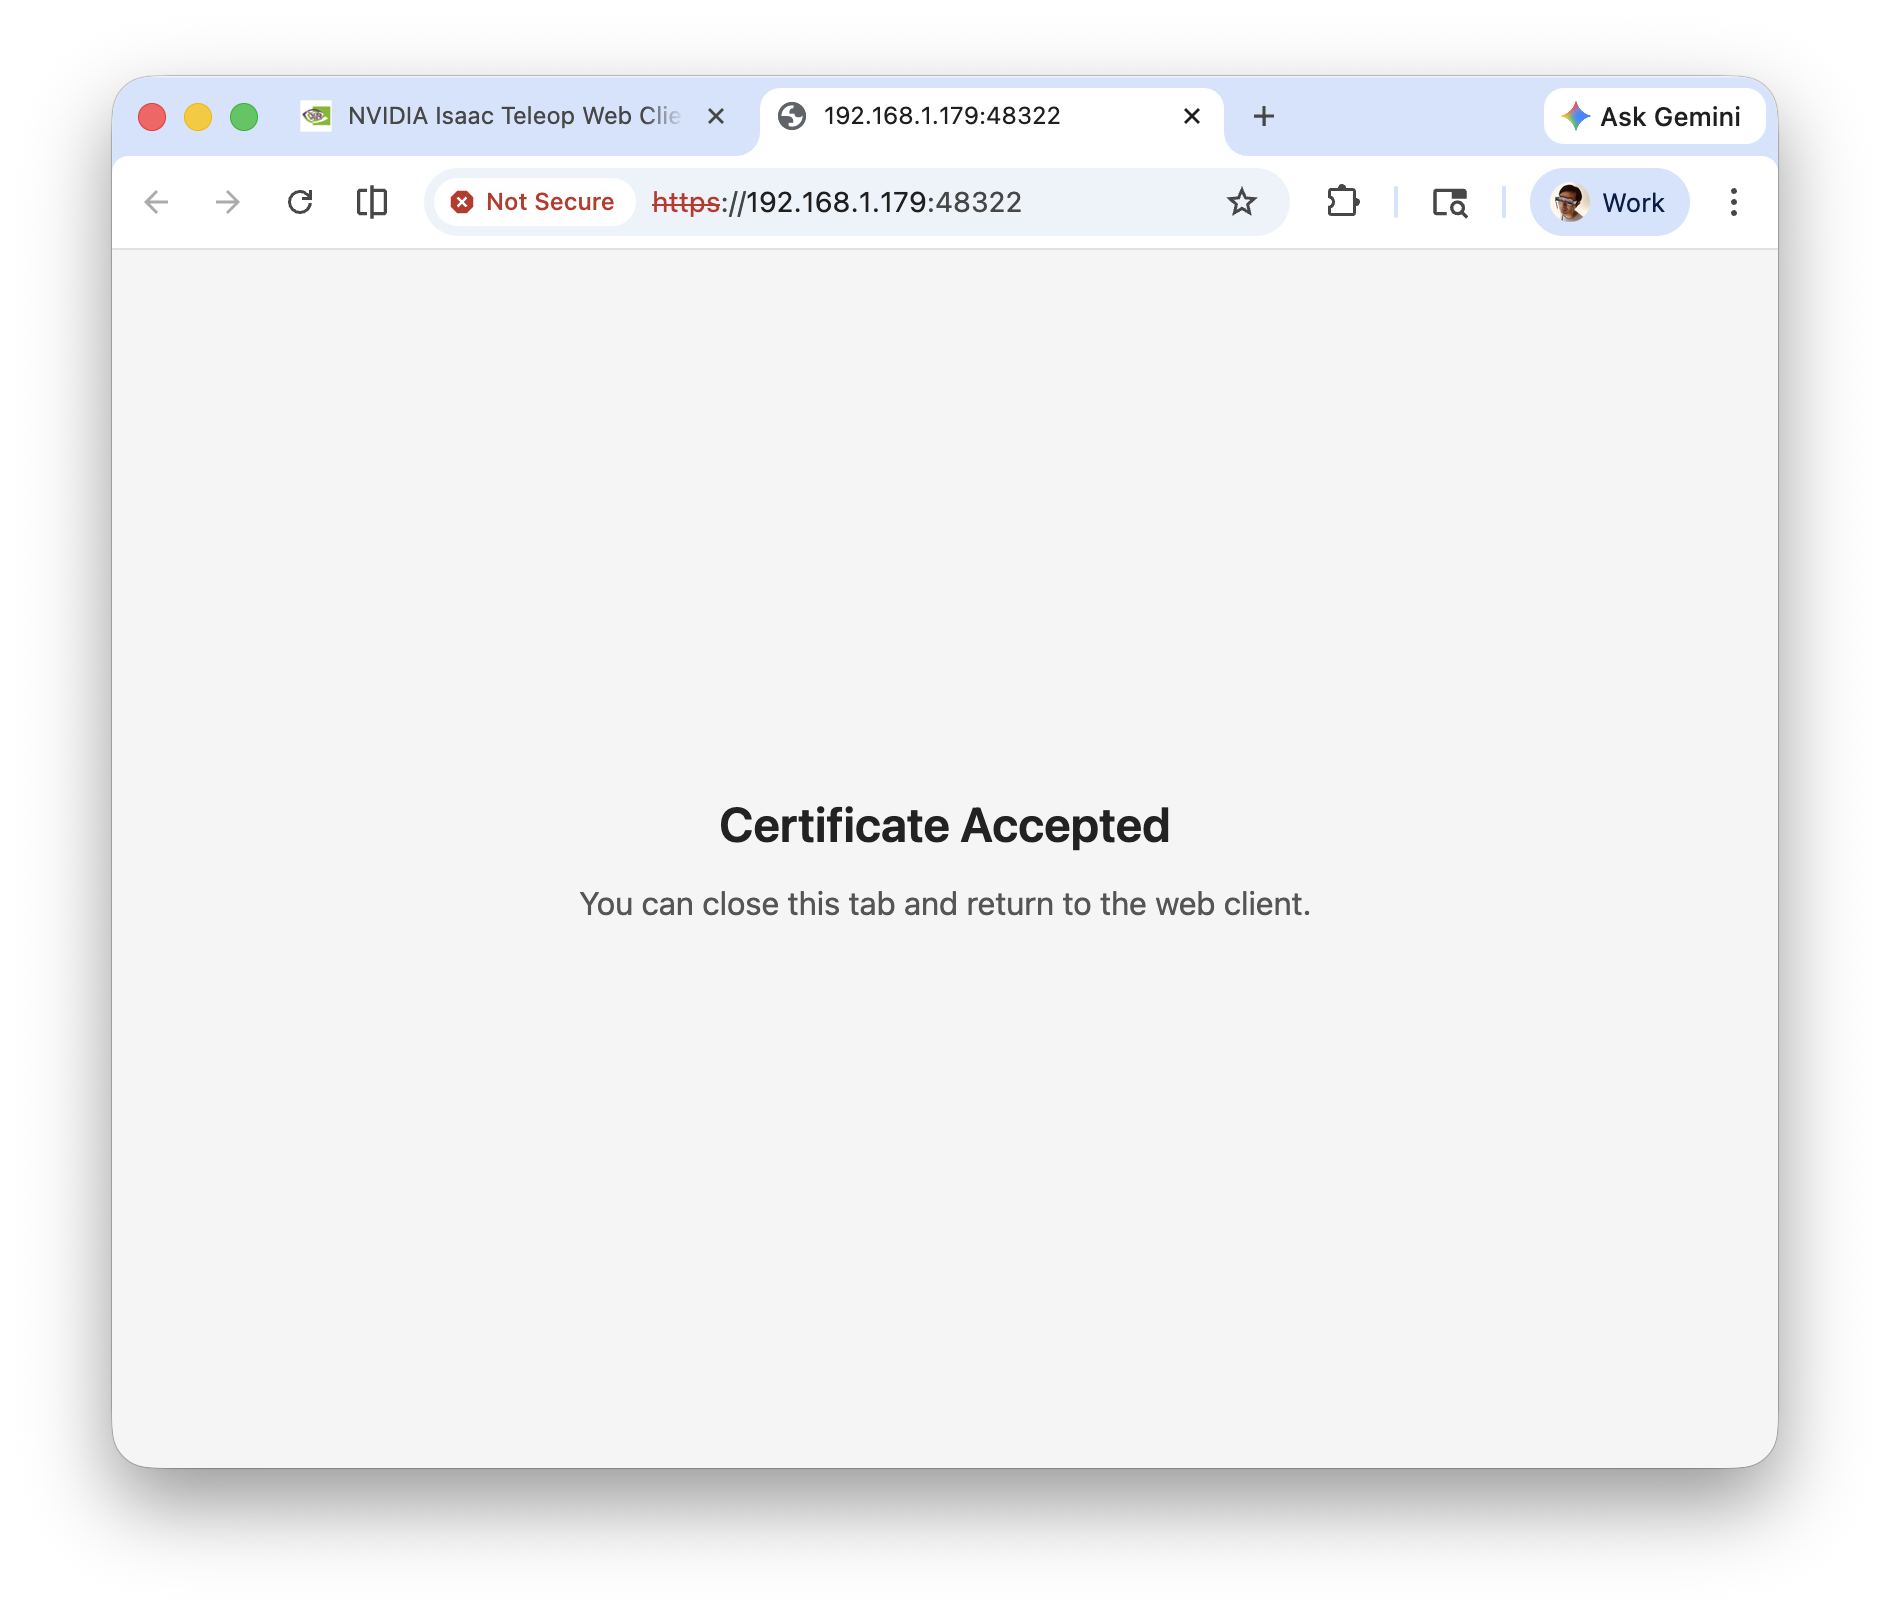
Figure: Certificate accepted page#
As illustrated in the figure above, there are 3 steps to connect to your headset:
Enter the IP address of the workstation running CloudXR
Accept the self-signed SSL certificate, which was created automatically during 3. Configure CloudXR (optional):
Click the Click https://<ip>:48322/ to accept cert link that appears on the page.
In the new tab, you will see a “Your connection is not private” warning. Click Advanced, then Proceed to <ip> (unsafe).
Once accepted, the page will show Certificate Accepted. Navigate back to the CloudXR.js client page.
Click Connect to begin teleoperation.
Note
For advanced usage and troubleshooting of CloudXR, see the CloudXR documentation for more details.
Offline / air-gapped use
On first run, the launcher syncs the published web client into
~/.cloudxr/static-client/ (override with TELEOP_WEB_CLIENT_STATIC_DIR):
index.html, bundle.js, and bundle.emulator.js. Subsequent runs
are offline once those files are cached.
For a true air-gapped machine, copy the full build/ output (or the
matching directory from nvidia.github.io/IsaacTeleop/client) into
~/.cloudxr/static-client/ on the air-gapped host before the first run.
The source code for the web client is in the deps/cloudxr/webxr_client/ directory. To build the web client from source, see Build WebXR Client.
Apple Vision Pro
For Apple Vision Pro, you will need to build and install the Isaac XR Teleop Sample Client. Follow the instructions in the Isaac XR Teleop Sample Client for Apple Vision Pro repository to build and install the sample client on your Apple Vision Pro.
Note
You will need v3.0.0 or newer of the Isaac XR Teleop Sample Client for Apple Vision Pro to connect to Isaac Teleop.
6. Run a teleop example#
Run the simplified gripper retargeting example. This demonstrates the full
pipeline: reading XR controller input via CloudXR, retargeting it through the
GripperRetargeter, and printing the resulting gripper command values:
python examples/teleop/python/gripper_retargeting_example_simple.py
Once running, squeeze the controller triggers on your XR headset to control the gripper. You should see periodic status output:
============================================================
Gripper Retargeting - Squeeze triggers to control grippers
============================================================

[  0.5s] Right: 0.00
[  1.0s] Right: 0.73
[  1.5s] Right: 1.00
...
The example runs for 20 seconds and then exits. To try other examples, see
examples/teleop/python/ — for instance:
se3_retargeting_example.py— maps hand or controller poses to end-effector poses (absolute or relative)dex_bimanual_example.py— bimanual dexterous hand retargetinggripper_retargeting_example.py— full gripper example with more configuration options
Next steps#

Teleoperation in Isaac Lab
Follow instructions in Teleoperation and Imitation Learning with Isaac Lab Mimic to know more about how to collect demonstrations with Isaac Lab and how to augment them with Isaac Lab Mimic and train imitation learning policies.
If you are new to Isaac Lab, follow instructions in Isaac Lab Quick Start to get started.

Teleoperation with Isaac ROS
For a complete Isaac ROS pipeline, follow Teleoperation with Isaac GR00T and Unitree G1 — an end-to-end workflow that combines Isaac Teleop, CloudXR, and ROS 2 to teleoperate a Unitree G1 humanoid. You validate the setup in MuJoCo, then deploy on real hardware over a Jetson AGX Thor, as a precursor to data collection and imitation learning.
ROS is a trademark of Open Robotics.
More Information#
Teleop Session — learn how
TeleopSessionworks and how to build custom retargeting pipelinesTeleviz — visualize robot camera and sensor feeds in an XR headset with the Televiz compositor (and share a single XR session with your teleop pipeline)
Build from Source — build the C++ core, Python bindings, and plugins from source