Visualization & Export#
Data stored in NCore-specific dataformats can be visualized and exported using the tools described below.
Rolling-Shutter Point-Cloud to Camera Projections#
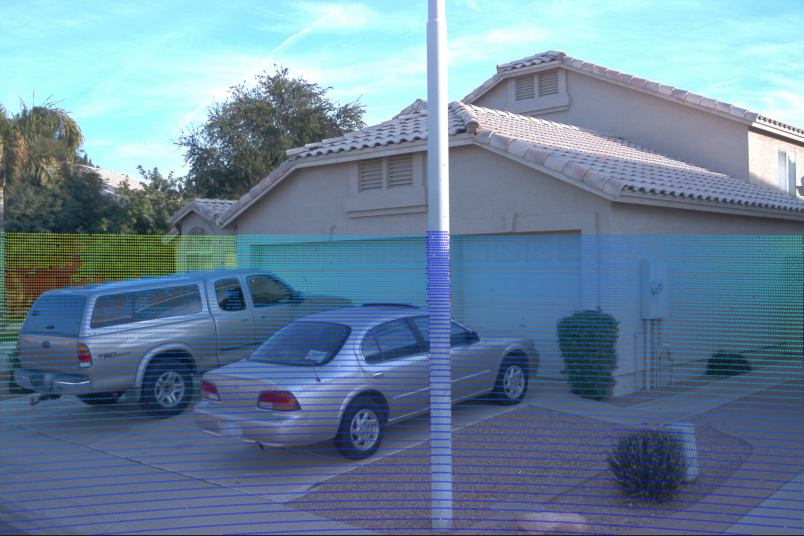
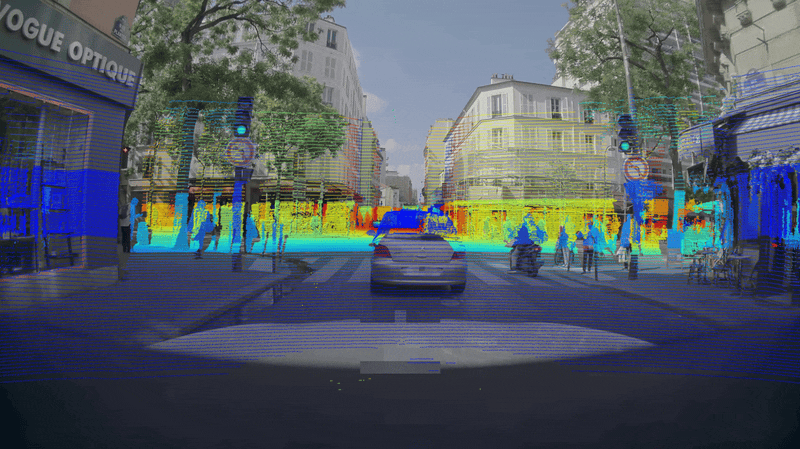
The tool //tools:ncore_project_pc_to_img visualizes projections of
point-clouds into camera images, applying sensor-specific rolling-shutter
compensation. This verifies the extrinsics of the point-cloud sensor, the
extrinsics of the cameras, the intrinsics of the cameras, as well as the
trajectories of the rig.
Example invocation:
bazel run //tools:ncore_project_pc_to_img \
    -- \
    --source-id=lidar00 \
    --camera-id=camera01 \
    --output-dir=<OUTPUT_FOLDER> \
    v4 \
    --component-group=<SEQUENCE_META.json>
Or with multiple component groups:
bazel run //tools:ncore_project_pc_to_img \
    -- \
    --source-id=lidar00 \
    --camera-id=camera01 \
    --output-dir=<OUTPUT_FOLDER> \
    v4 \
    --component-group=<COMPONENT_GROUP0> \
    --component-group=<COMPONENT_GROUP1>
The --source-id flag accepts any point cloud source: a native point cloud
ID (e.g. sfm_points), a lidar ID, or a radar ID.
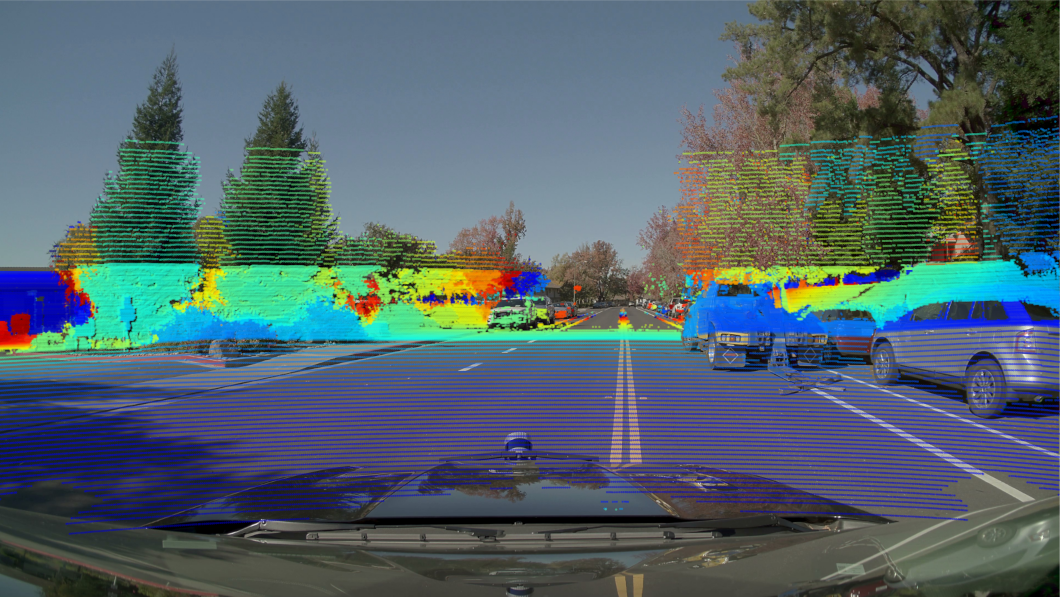
Point-to-camera projection on NV Hyperion data#
Point-to-camera projection on Waymo-Open data#
Point-to-camera projection on Physical-AI-AV data#
Point-Cloud Export#
The tool //tools:ncore_export_ply exports point-clouds into common
.ply format, transforming points into different frames. Specifying
--frame=world allows to visualize multiple frames in a common frame to
verify the extrinsics of the point-cloud sensor, as well as the trajectories of
the rig.
Example invocation:
bazel run //tools:ncore_export_ply \
    -- \
    --output-dir=<OUTPUT_FOLDER> \
    --source-id=lidar00 \
    --frame=world \
    v4 \
    --component-group=<COMPONENT_GROUP0> \
    --component-group=<COMPONENT_GROUP1>
The --source-id flag accepts any point cloud source (native, lidar, or
radar).
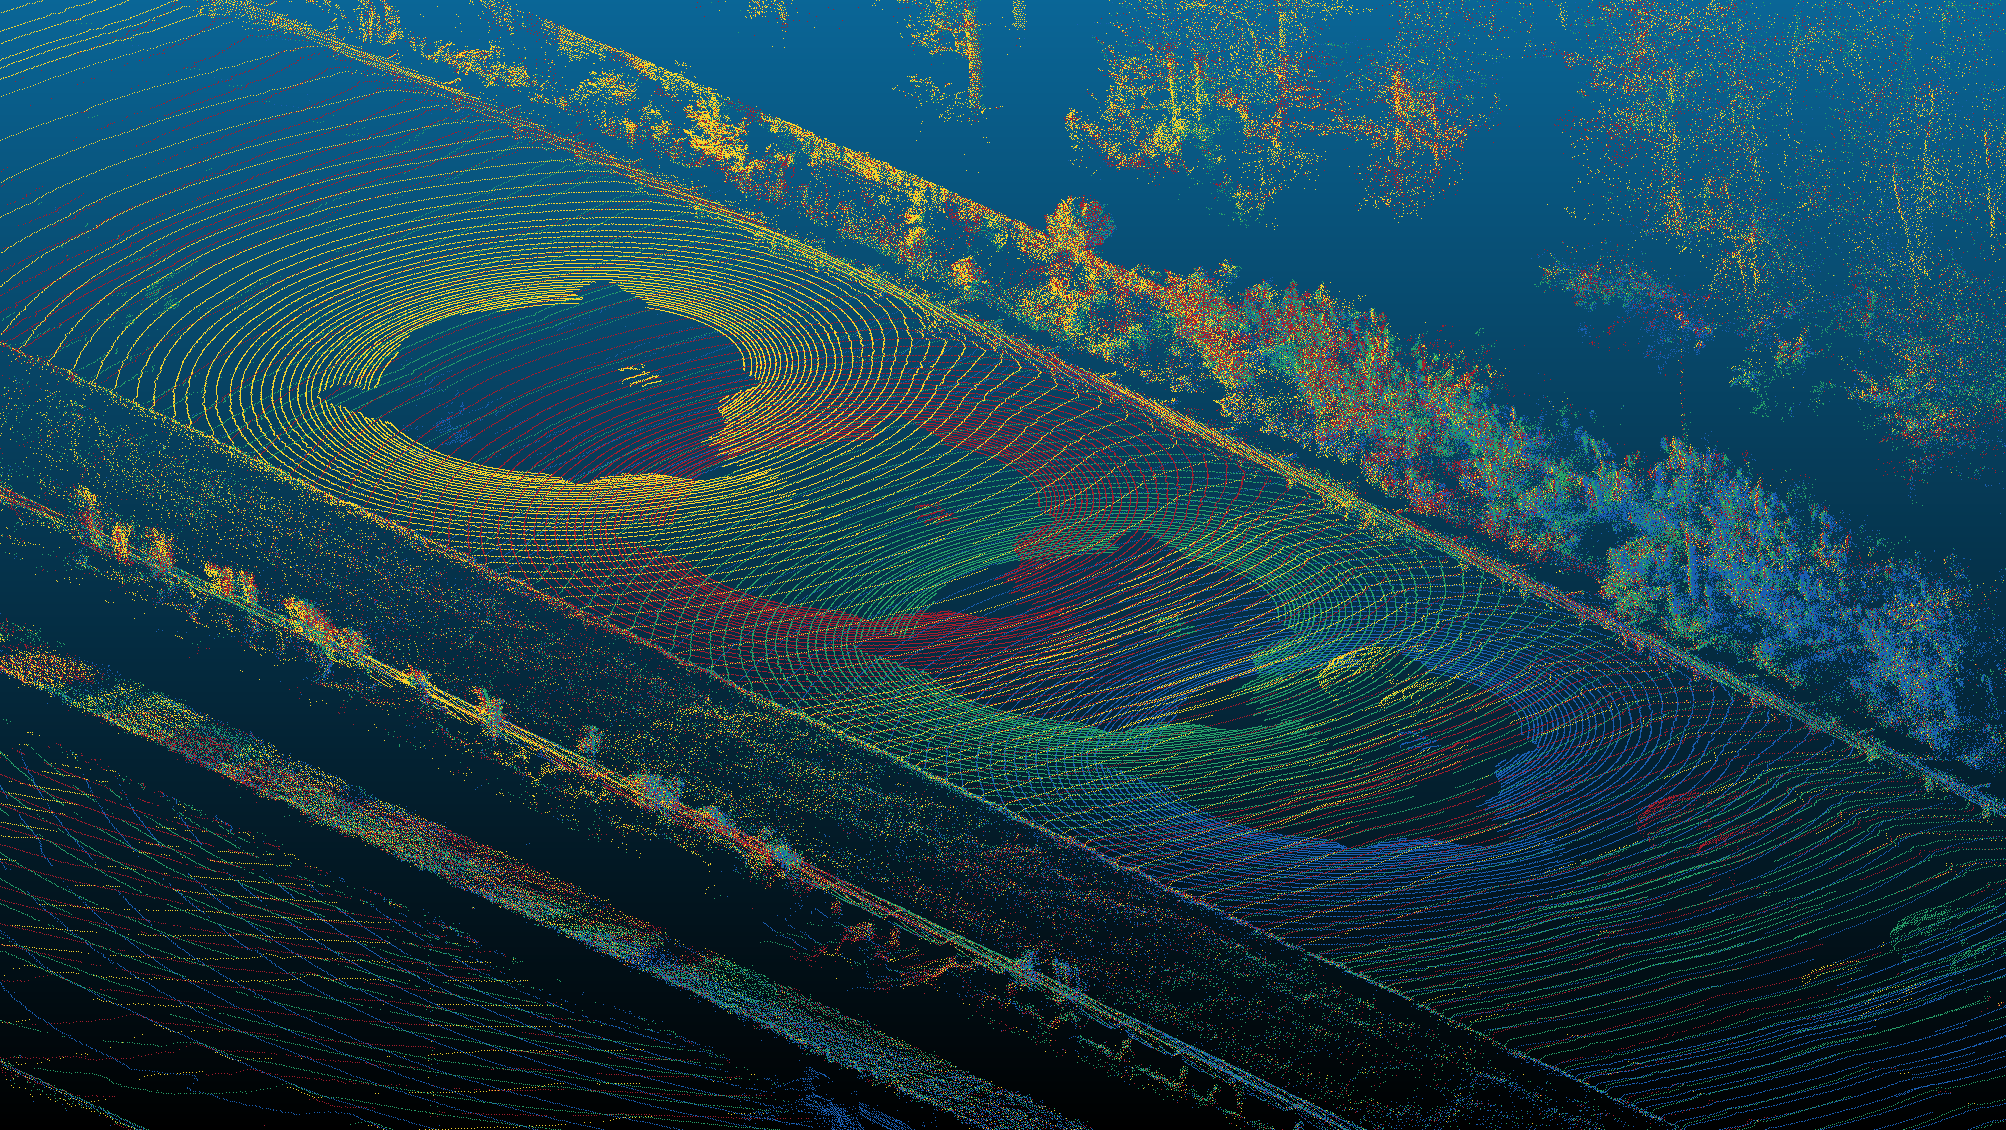
Differently colored point clouds exported to a common world frame#
Colored Point-Cloud Export#
The tool //tools:ncore_export_colored_pc projects point clouds onto a
camera image to obtain per-point RGB colors, then exports the result as .ply
files. This combines rolling-shutter-aware projection with PLY export to produce
colored point clouds useful for visual inspection and downstream processing.
If the point cloud source already has an RGB attribute (e.g. COLMAP SfM points),
the --use-source-rgb flag skips camera projection and uses the native colors.
Example invocation:
bazel run //tools:ncore_export_colored_pc \
    -- \
    --output-dir=<OUTPUT_FOLDER> \
    --source-id=lidar00 \
    --camera-id=camera01 \
    v4 \
    --component-group=<SEQUENCE_META.json>
Option |
Default |
Description |
|---|---|---|
|
(required) |
Directory for output PLY files |
|
(first available) |
Point cloud source to export (native, lidar, or radar ID) |
|
|
Camera sensor used for coloring |
|
|
Torch device ( |
|
|
Projection pose mode ( |
|
|
Output coordinate space ( |
|
|
Lidar ray bundle return index |
|
|
Filename pattern ( |
|
all |
First pc index to export |
|
all |
Past-the-end pc index |
|
1 |
Step for downsampling point clouds |
Camera Frame Export#
The tool //tools:ncore_export_camera exports camera frames to image files
for introspection, optionally encoding them as MP4 video.
Example invocation:
bazel run //tools:ncore_export_camera \
    -- \
    --output-dir=<OUTPUT_FOLDER> \
    --camera-id=camera00 \
    v4 \
    --component-group=<SEQUENCE_META.json>
Or with multiple component groups:
bazel run //tools:ncore_export_camera \
    -- \
    --output-dir=<OUTPUT_FOLDER> \
    --camera-id=camera00 \
    v4 \
    --component-group=<COMPONENT_GROUP0> \
    --component-group=<COMPONENT_GROUP1>
Rectification#
Passing --rectify rectifies each frame to an ideal (distortion-free) pinhole
camera before exporting. The ideal-pinhole target is derived from the source
camera intrinsics via IdealPinholeCameraModelParameters.from_source()
(see Rectification), the frames are remapped with a
Rectificator and re-encoded as PNG, and the resulting
ideal-pinhole intrinsics are written alongside the images as
<camera_id>.rectified_intrinsics.json.
bazel run //tools:ncore_export_camera \
    -- \
    --output-dir=<OUTPUT_FOLDER> \
    --camera-id=camera00 \
    --rectify \
    --rectify-target-fov-deg=120 \
    v4 \
    --component-group=<SEQUENCE_META.json>
--rectify-target-fov-deg selects which rays the rectified pinhole covers,
i.e. the angular extent (field of view) around the optical axis. Because a
pinhole maps angle to pixel distance as \(r = f\tan\theta\), different
values produce genuinely different views of the world: a wider field of view
stretches the periphery increasingly towards the image border (the optical
center stays fixed). When omitted, the source’s natural field of view is used
(for wide fisheye / omnidirectional cameras this is a narrow rectilinear central
window, since the full field of view cannot be represented by a pinhole).
Widening past the captured field of view yields black borders; rectification
fails if the requested field of view cannot be represented by a pinhole (at or
beyond 180 degrees).
--rectify-fov-factor multiplies the (target or natural) field of view before
rectifying: > 1 widens, < 1 narrows. It is a convenient way to zoom
relative to the inferred default without computing an explicit angle, e.g.
--rectify-fov-factor 0.8 to keep the central 80% of the natural field of
view.
--rectify-resolution (e.g. 1280x720) exports the rectified pinhole at a
different output resolution / aspect ratio than the source. The rectified
intrinsics are re-canvassed onto the requested resolution while preserving the
per-axis field of view (the focal length and principal point scale with the
resolution). When omitted, the source resolution is kept. For example:
bazel run //tools:ncore_export_camera \
    -- \
    --output-dir=<OUTPUT_FOLDER> \
    --camera-id=camera00 \
    --rectify \
    --rectify-resolution=1280x720 \
    v4 \
    --component-group=<SEQUENCE_META.json>
Option |
Default |
Description |
|---|---|---|
|
(required) |
Directory for the exported frames (and rectified intrinsics, if rectifying) |
|
|
Camera sensor to export image frames for |
|
all / all / 1 |
Frame export range and downsampling step |
|
|
Whether to write per-frame image files |
|
|
Use timestamp filenames instead of frame-index filenames |
|
off |
Encode an MP4 video of the (possibly rectified) frames |
|
|
Frame-rate for video encoding |
|
|
Rectify frames to an ideal (distortion-free) pinhole before exporting |
|
(natural FOV) |
Target full field of view [deg] of the rectified pinhole (wider or narrower than the natural FOV) |
|
|
Multiplicative factor on the (target or natural) field of view ( |
|
(source resolution) |
Output resolution |