Local Installation
Introduction
This guide walks through how to install CUDA-Q on your system, and how to set up VS Code for local development. The section on connecting to a remote host contains some guidance for application development on a remote host where CUDA-Q is installed.
The following sections contain instructions for how to install CUDA-Q on your machine using
Docker: A fully featured CUDA-Q installation including all C++ and Python tools is available as a Docker image.
Singularity: A Singularity container can easily be created based on our Docker images.
PyPI: Additionally, we distribute pre-built Python wheels via PyPI.
Pre-built binaries: We also provide pre-built C++ binaries, bundled as self-extracting archive, that work across a range of Linux operating systems.
If you would like to build CUDA-Q from source to deploy on an HPC system without relying on a container runtime, please follow the instructions for Installation from Source. If, on the other hand, you want to contribute to the development of CUDA-Q itself and hence want to build a custom version of CUDA-Q from source, follow the instructions on the CUDA-Q GitHub repository instead.
If you are unsure which option suits you best, we recommend using our Docker image to develop your applications in a controlled environment that does not depend on, or interfere with, other software that is installed on your system.
Docker
To download and use our Docker images, you will need to install and launch the Docker engine. If you do not already have Docker installed on your system, you can get it by downloading and installing Docker Desktop. If you do not have the necessary administrator permissions to install software on your machine, take a look at the section below on how to use Singularity instead.
Docker images for all CUDA-Q releases are available on the NGC Container Registry. In addition to publishing stable releases, we also publish Docker images whenever we update certain branches on our GitHub repository. These images are published in our nightly channel on NGC. To download the latest version on the main branch of our GitHub repository, built to work with CUDA 12, for example, use the command
docker pull nvcr.io/nvidia/nightly/cuda-quantum:cu12-latest
Early prototypes for features we are considering can be tried out by using the image tags starting
with experimental. The README in the /home/cudaq folder in the container gives more details
about the feature. We welcome and appreciate your feedback about these early prototypes;
how popular they are will help inform whether we should include them in future releases.
Once you have downloaded an image, the container can be run using the command
docker run -it --name cuda-quantum nvcr.io/nvidia/nightly/cuda-quantum:cu12-latest
Replace the image name and/or tag in the command above, if necessary, with the one you want to use.
This will give you terminal access to the created container. To enable support
for GPU-accelerated backends, you will need to pass the --gpus flag when launching
the container, for example:
docker run -it --gpus all --name cuda-quantum nvcr.io/nvidia/nightly/cuda-quantum:cu12-latest
Note
This command will fail if you do not have a suitable NVIDIA GPU available, or if your driver version is insufficient. To improve compatibility with older drivers, you may need to install the NVIDIA container toolkit.
You can stop and exit the container by typing the command exit. If you did not specify
--rm flag when launching the container, the container still exists after exiting, as well as any
changes you made in it. You can get back to it using
the command docker start -i cuda-quantum.
You can delete an existing container and any changes you made using docker rm -v cuda-quantum.
When working with Docker images, the files inside the container are not visible outside the container environment. To facilitate application development with, for example, debugging, code completion, hover information, and so on, please take a look at the section on Development with VS Code.
Alternatively, it is possible, but not recommended, to launch an SSH server inside the container environment and connect an IDE using SSH. To do so, make sure you have generated a suitable RSA key pair; if your ~/.ssh/ folder does not already contain the files id_rsa.pub and id.rsa,
follow the instructions for generating a new SSH key on this page.
You can then launch the container and connect to it via SSH by executing the following commands:
docker run -itd --gpus all --name cuda-quantum -p 2222:22 nvcr.io/nvidia/nightly/cuda-quantum:cu12-latest
docker exec cuda-quantum bash -c "sudo apt-get install -y --no-install-recommends openssh-server"
docker exec cuda-quantum bash -c "sudo sed -i -E "s/#?\s*UsePAM\s+.+/UsePAM yes/g" /etc/ssh/sshd_config"
docker cp ~/.ssh/id_rsa.pub cuda-quantum:/home/cudaq/.ssh/authorized_keys
docker exec -d cuda-quantum bash -c "sudo -E /usr/sbin/sshd -D"
ssh cudaq@localhost -p 2222 -o StrictHostKeyChecking=no -o UserKnownHostsFile=/dev/null -o GlobalKnownHostsFile=/dev/null
Known Blackwell Issues
There are some known Blackwell issues when using CUDA-Q.
Note
If you are using CUDA 12.8 on Blackwell, you may need to install additional dependencies to use the python wheels.
If you see the following error:
cupy_backends.cuda.api.driver.CUDADriverError: CUDA_ERROR_NO_BINARY_FOR_GPU: no kernel image is available for execution on the device
You may need to install the more updated python wheels.
pip install nvidia-cuda-runtime-cu12 nvidia-cublas-cu12 nvidia-cuda-nvrtc-cu12 nvidia-nvjitlink-cu12 nvidia-curand-cu12
Note
If you are attempting to use torch integrators on Blackwell, you will need to install the nightly torch version.
python3 -m pip install --pre torch --index-url https://download.pytorch.org/whl/nightly/cu128
With this new version of torch, you may see:
Module 'torch' was found, but when imported by pytest it raised:
ImportError('/home/cudaq/.local/lib/python3.12/site-packages/torch/lib/../../nvidia/cusparse/lib/libcusparse.so.12: undefined symbol: __nvJitLinkCreate_12_8, version libnvJitLink.so.12')
This may be caused by an incorrectly linked shared object. If you encounter this, try adding the shared object to the LD_LIBRARY_PATH:
export LD_LIBRARY_PATH=$(pip show nvidia-nvjitlink-cu12 | sed -nE 's/Location: (.*)$/\1/p')/nvidia/nvjitlink/lib:$LD_LIBRARY_PATH
Singularity
You can use Singularity to run a CUDA-Q container in a folder without needing administrator permissions.
If you do not already have Singularity installed, you can build a relocatable installation from source.
To do so on Linux or WSL, make sure you have the necessary prerequisites installed, download a suitable version of the go toolchain, and make sure the go binaries are on your PATH. You can then build Singularity with the commands
wget https://github.com/sylabs/singularity/releases/download/v4.0.1/singularity-ce-4.0.1.tar.gz
tar -xzf singularity-ce-4.0.1.tar.gz singularity-ce-4.0.1/ && rm singularity-ce-4.0.1.tar.gz && cd singularity-ce-4.0.1/
./mconfig --without-suid --prefix="$HOME/.local/singularity"
make -C ./builddir && make -C ./builddir install && cd .. && rm -rf singularity-ce-4.0.1/
echo 'PATH="$PATH:$HOME/.local/singularity/bin/"' >> ~/.profile && source ~/.profile
For more information about using Singularity on other systems, take a look at the admin guide.
Once you have singularity installed, create a file cuda-quantum.def with the following content:
Bootstrap: docker
From: nvcr.io/nvidia/nightly/cuda-quantum:cu12-latest

%runscript
    mount devpts /dev/pts -t devpts
    cp -r /home/cudaq/* .
    bash
Replace the image name and/or tag in the From line, if necessary, with the one you want to use;
In addition to publishing stable releases,
we also publish Docker images whenever we update certain branches on our GitHub repository.
These images are published in our nightly channel on NGC.
Early prototypes for features we are considering can be tried out by using the image tags starting
with experimental. We welcome and appreciate your feedback about these early prototypes;
how popular they are will help inform whether we should include them in future releases.
You can then create a CUDA-Q container by running the following commands:
singularity build --fakeroot cuda-quantum.sif cuda-quantum.def
singularity run --writable --fakeroot cuda-quantum.sif
In addition to the files in your current folder, you should now
see a README file, as well as examples and tutorials.
To enable support for GPU-accelerated backends, you will need to pass the
the --nv flag when running the container:
singularity run --writable --fakeroot --nv cuda-quantum.sif
nvidia-smi
The output of the command above lists the GPUs that are visible and accessible in the container environment.
Note
If you do not see any GPUs listed in the output of nvidia-smi,
it means the container environment is unable to access a suitable NVIDIA GPU.
This can happen if your driver version is insufficient, or if you are
working on WSL. To improve compatibility with older drivers, or to enable GPU support
on WSL, please install the NVIDIA container toolkit, and update the singularity configuration
to set use nvidia-container-cli to yes and configure the correct nvidia-container-cli path.
The two commands below use sed to do that:
sed -i 's/use nvidia-container-cli = no/use nvidia-container-cli = yes/' "$HOME/.local/singularity/etc/singularity/singularity.conf"
sed -i 's/# nvidia-container-cli path =/nvidia-container-cli path = \/usr\/bin\/nvidia-container-cli/' "$HOME/.local/singularity/etc/singularity/singularity.conf"
You can exit the container environment by typing the command exit.
Any changes you made will still be visible after you exit the container, and you can re-enable the
container environment at any time using the run command above.
To facilitate application development with, for example, debugging, code completion, hover information, and so on, please take a look at the section on Development with VS Code.
Python wheels
CUDA-Q Python wheels are available on PyPI.org. Installation instructions can be found in the project description. For more information about available versions and documentation, see CUDA-Q Releases.
There are currently no source distributions available on PyPI, but you can download the source code for the latest version of the CUDA-Q Python wheels from our GitHub repository. The source code for previous versions can be downloaded from the respective GitHub Release.
Wheels are distributed for Linux (x86_64 and ARM64) and macOS (ARM64/Apple silicon only).
If your platform is not officially supported and
pip does not find a compatible wheel to install, you can build your own
wheel from source following the instructions here: Installation from Source.
To build the CUDA-Q Python API for the purpose of contributing to our GitHub repository, follow the instructions for Setting up your Environment, and then run the following commands in the repository root:
bash scripts/install_prerequisites.sh
pip install . --user
Pre-built binaries
Starting with the 0.6.0 release, we provide pre-built binaries for using CUDA-Q with C++. Support for using CUDA-Q with Python can be installed side-by-side with the pre-built binaries for C++ by following the instructions on PyPI.org. The pre-built binaries work across the operating systems listed under Dependencies and Compatibility, including Linux and macOS (ARM64/Apple silicon only, CPU-only).
Before installing our pre-built binaries, please make sure that your
operating system is using the GNU C library
version 2.28 or newer. You can confirm this by checking the output of the command
ldd --version. If this command does not exist, or shows an older version than 2.28,
please double check that your operating system is listed as
supported. If you use an operating system
with an older GNU C library version, you will need to build the installer from
source following the instructions in Installation from Source.
You can download the install_cuda_quantum file for your platform from
the assets of the respective GitHub release:
Linux:
install_cuda_quantum_cu12.<arch>orinstall_cuda_quantum_cu13.<arch>(where<arch>isx86_64oraarch64)macOS:
install_cuda_quantum_darwin.arm64(CPU-only, Apple silicon)
The installer is a self-extracting archive that contains the
pre-built binaries as well as a script to move them to the correct locations. You will need
bash, tar, and gzip to run the installer.
To install CUDA-Q to the default location (/opt/nvidia/cudaq), execute the command
MPI_PATH=/usr/local/openmpi \
sudo -E bash install_cuda_quantum*.$(uname -m) --accept && . /etc/profile
To install to a custom location (no sudo required), pass --installpath:
bash install_cuda_quantum*.$(uname -m) --accept -- --installpath $HOME/.cudaq
In both cases, the installer configures your shell profile so that CUDA-Q
is available in new shells automatically. To use it in the current shell,
run source <installpath>/set_env.sh.
Note
To use GPU-accelerated backends, you will need to install the necessary CUDA runtime libraries. For more information see the corresponding section on Additional CUDA Tools.
The installation ensures that the necessary environment variables for
using the CUDA-Q toolchain are set upon login for all POSIX shells.
Confirm that the nvq++ command is found. If it is not, please make sure
to set the environment variables defined by the set_env.sh script in the
CUDA-Q installation folder (/opt/nvidia/cudaq for the pre-built installer,
or $HOME/.cudaq for local builds from source).
If an MPI installation is available in the directory defined by MPI_PATH,
the installer automatically enables MPI support in CUDA-Q.
If you do not have MPI installed on your system, you can simply
leave that path empty, and CUDA-Q will be installed without MPI support.
If you install MPI at a later point in time, you can activate the MPI support in CUDA
Quantum by setting the MPI_PATH variable to its installation location and
executing the commands
MPI_PATH=/usr/local/openmpi # update this path as needed
bash "${CUDA_QUANTUM_PATH}/distributed_interfaces/activate_custom_mpi.sh"
Note
Please make sure that you have the necessary development headers of the C standard
library installed. You can check this by searching for features.h, commonly found
in /usr/include/. You can install the necessary headers via package manager
(usually the package name is called something like glibc-devel or libc6-dev).
These headers are also included with any installation of GCC.
Development with VS Code
To facilitate application development with, for example, debugging, code completion, hover information, and so on, we recommend using VS Code. VS Code provides a seamless development experience on all platforms, and is also available without installation via web browser. This sections describes how to connect VS Code to a running container on your machine. The section on connecting to a remote host contains information on how to set up your development environment when accessing CUDA-Q on a remote host instead.
Using a Docker container
Before connecting VS Code, open a terminal/shell, and start the CUDA-Q Docker container following the instructions in the section above.
If you have a local installation of VS Code you can connect to the running container using the Dev Containers extension. If you want to use VS Code in the web browser, please follow the instructions in the section Developing with Remote Tunnels instead.
After installing the
Dev Containers extension, launch VS Code, open the Command Palette with Ctrl+Shift+P, and enter
”Dev Containers: Attach to Running Container”.
You should see and select the running cuda-quantum container in the list.
After the window reloaded, enter “File: Open Folder” in the Command Palette to open the /home/cudaq/ folder.
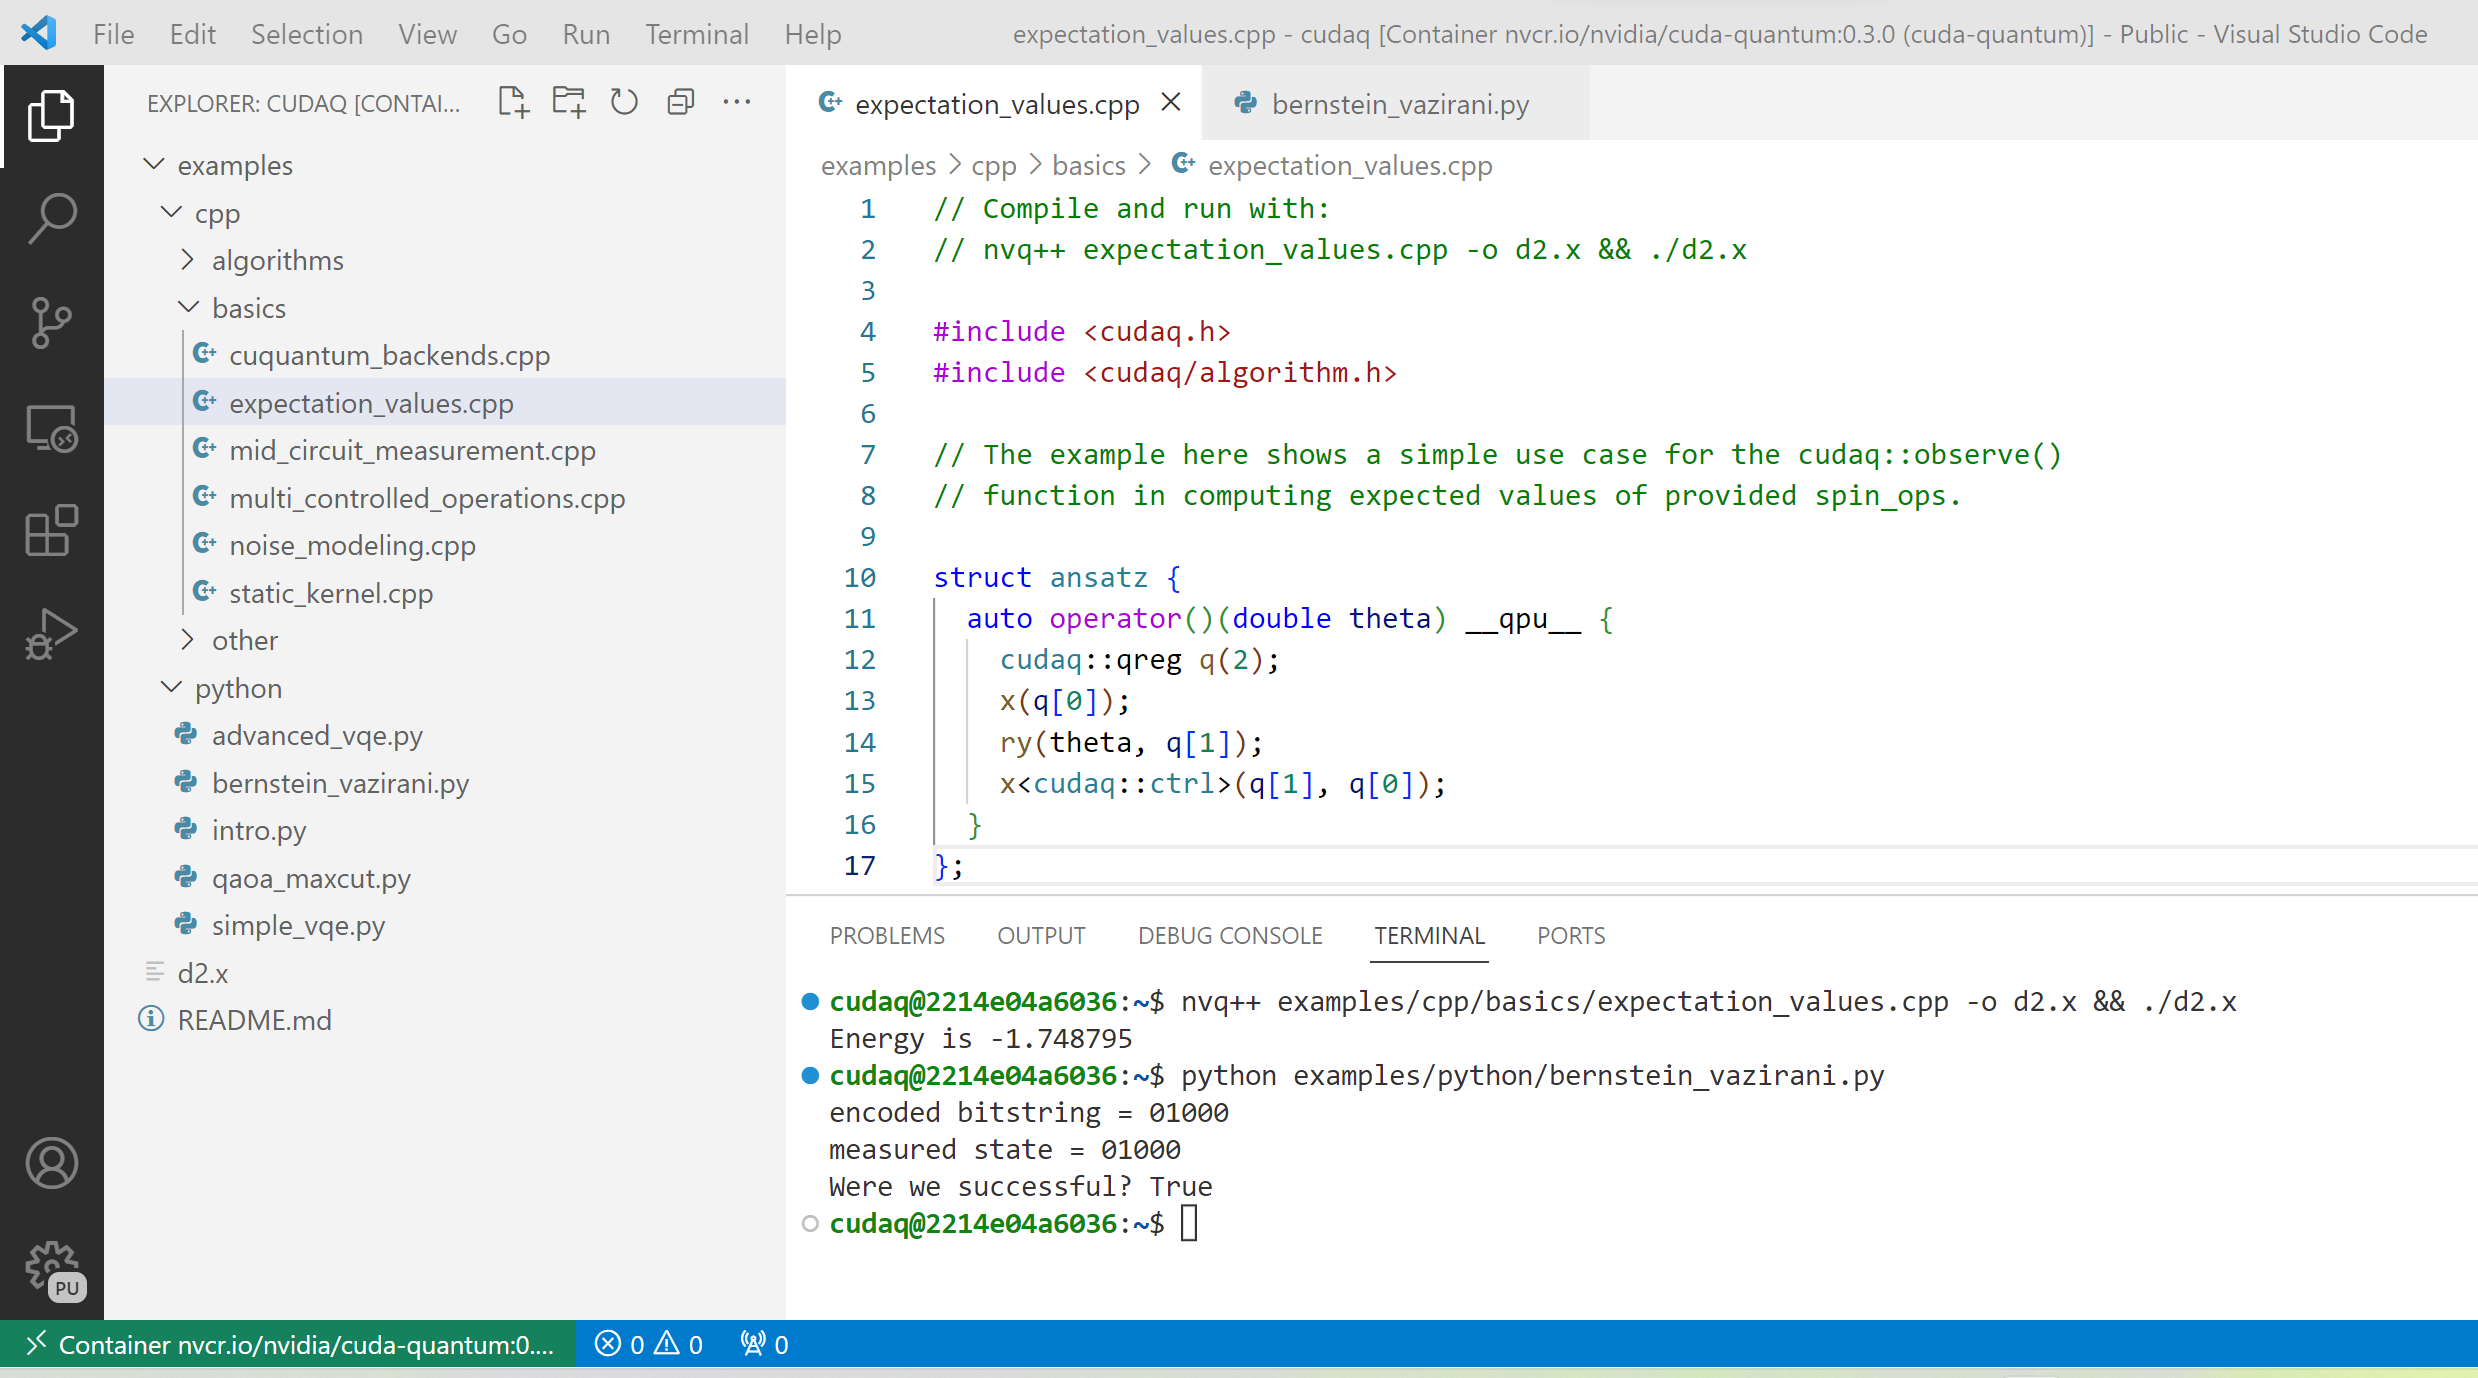
To run the examples, open the Command Palette and enter “View: Show Terminal” to launch an integrated terminal. You are now all set to get started with CUDA-Q development.
Using a Singularity container
If you have a GitHub or Microsoft account, we recommend that you connect to a CUDA-Q container using tunnels. To do so, launch a CUDA-Q Singularity container following the instructions in the section above, and then follow the instructions in the section Developing with Remote Tunnels.
If you cannot use tunnels, you need a local installation of
VS Code and you need to install
the Remote - SSH extension.
Make sure you also have a suitable SSH key pair; if your ~/.ssh/ folder does not already contain
the files id_rsa.pub and id.rsa, follow the instructions for generating a new SSH key on
this page.
To connect VS Code to a running CUDA-Q container, the most convenient setup is to install and run an SSH server in the Singularity container. Open a terminal/shell in a separate window, and enter the following commands to create a suitable sandbox:
singularity build --sandbox cuda-quantum-sandbox cuda-quantum.sif
singularity exec --writable --fakeroot cuda-quantum-sandbox \
  apt-get install -y --no-install-recommends openssh-server
cat ~/.ssh/id_rsa.pub >> ~/.ssh/authorized_keys
You can launch this sandbox by entering the commands below. Please see the Singularity section above
for more information about how to get the cuda-quantum.sif image, and how to enable GPU-acceleration
with the --nv flag.
singularity run --writable --fakeroot --nv --network-args="portmap=22:2222/tcp" cuda-quantum-sandbox
/usr/sbin/sshd -D -p 2222 -E sshd_output.txt
Note
Make sure to use a free port. You can check if the SSH server is ready and listening
by looking at the log in sshd_output.txt. If the port is already in use, you can
replace the number 2222 by any free TCP port in the range 1025-65535 in all
commands.
Entering Ctrl+C followed by exit will stop the running container. You can re-start
it at any time by entering the two commands above. While the container is running,
open the Command Palette in VS Code with Ctrl+Shift+P, enter “Remote-SSH: Add new
SSH Host”, and enter the following SSH command:
ssh root@localhost -p 2222 -o StrictHostKeyChecking=no -o UserKnownHostsFile=/dev/null -o GlobalKnownHostsFile=/dev/null
Note
If you are working on Windows and are building and running the Singularity container in WSL,
make sure to copy the used SSH keys to the Windows partition, such that VS Code can connect with
the expected key. Alternatively, add the used public key to the /root/.ssh/authorized_keys file in
the Singularity container.
You can then connect to the host by opening the Command Palette, entering “Remote SSH: Connect Current Window to Host”, and choosing the newly created host. After the window reloaded, enter “File: Open Folder” in the Command Palette to open the desired folder.
To run the examples, open the Command Palette and enter “View: Show Terminal” to launch an integrated terminal. You are now all set to get started with CUDA-Q development.
Connecting to a Remote Host
Depending on the setup on the remote host, there are a couple of different options for developing CUDA-Q applications.
If a CUDA-Q container is running on the remote host, and you have a GitHub or Microsoft account, take a look at Developing with Remote Tunnels. This works for both Docker and Singularity containers on the remote host, and should also work for other containers.
If you cannot use tunnels, or if you want to work with an existing CUDA-Q installation without using a container, take a look at Remote Access via SSH instead.
Developing with Remote Tunnels
Remote access via tunnel can easily be enabled with the VS Code CLI. This allows to connect either a local installation of VS Code, or the VS Code Web UI, to a running CUDA-Q container on the same or a different machine.
Creating a secure connection requires authenticating with the same GitHub or Microsoft account on each end. Once authenticated, an SSH connection over the tunnel provides end-to-end encryption. To download the VS Code CLI, if necessary, and create a tunnel, execute the following command in the running CUDA-Q container, and follow the instructions to authenticate:
vscode-setup tunnel --name cuda-quantum-remote --accept-server-license-terms
You can then either open VS Code in a web browser, or connect a local installation of VS Code.
To connect a local installation of VS Code, make sure you have the
Remote - Tunnels extension installed,
then open the Command Palette with Ctrl+Shift+P, enter “Remote Tunnels: Connect to Tunnel”,
and enter cuda-quantum-remote. After the window reloaded, enter “File: Open Folder” in the Command Palette
to open the /home/cudaq/ folder.
You should see a pop up asking if you want to install the recommended extensions. Selecting to install them will configure VS Code with extensions for working with C++, Python, and Jupyter. You can always see the list of recommended extensions that aren’t installed yet by clicking on the “Extensions” icon in the sidebar and navigating to the “Recommended” tab.
Remote Access via SSH
To facilitate application development with, for example, debugging, code completion, hover information, and so on, you can connect a local installation of VS Code to a remote host via SSH.
Note
For the best user experience, we recommend to launch a CUDA-Q container on the remote host, and then connect VS Code using tunnels. If a connection via tunnel is not possible, this section describes using SSH instead.
To do so, make sure you have Remote - SSH extension installed.
Open the Command Palette with Ctrl+Shift+P, enter “Remote-SSH: Add new
SSH Host”, and enter the SSH command to connect to your account on the remote host.
You can then connect to the host by opening the Command Palette, entering
“Remote SSH: Connect Current Window to Host”, and choosing the newly created host.
When prompted, choose Linux as the operating system, and enter your
password. After the window reloaded, enter “File: Open Folder” in the
Command Palette to open the desired folder. Our GitHub repository contains
a folder with VS Code configurations including a list of recommended extensions for
working with CUDA-Q; you can copy these configurations into the a folder named .vscode in your workspace to use them.
If you want to work with an existing CUDA-Q installation on the remote host, you are all set.
Alternatively, you can use Singularity to build and run a container following the instructions in
this section. Once the cuda-quantum.sif image is built and
available in your home directory on the remote host, you can update your VS Code configuration
to enable/improve completion, hover information, and other development tools within the container.
To do so, open the Command Palette and enter “Remote-SSH: Open SSH Configuration File”.
Add a new entry to that file with the command to launch the container, and edit the configuration
of the remote host, titled remote-host in the snippets below, to add a new identifier:
Host cuda-quantum~*
  RemoteCommand singularity run --writable --fakeroot --nv ~/cuda-quantum.sif
  RequestTTY yes

Host remote-host cuda-quantum~remote-host
  HostName ...
  ...
You will need to edit a couple of VS Code setting to make use of the newly defined remote command; open the Command Palette, enter “Preferences: Open User Settings (JSON)”, and add or update the following configurations:
"remote.SSH.enableRemoteCommand": true,
"remote.SSH.useLocalServer": true,
"remote.SSH.remoteServerListenOnSocket": false,
"remote.SSH.connectTimeout": 120,
"remote.SSH.serverInstallPath": {
    "cuda-quantum~remote-host": "~/.vscode-container/cuda-quantum",
},
After saving the changes, you should now be able to select cuda-quantum~remote-host as the host
when connecting via SSH, which will launch the CUDA-Q container and connect VS Code to it.
Note
If the connection to cuda-quantum~remote-host fails, you may need to specify the full
path to the singularity executable on the remote host, since environment variables,
and specifically the configured PATH may be different during launch than in your user account.
DGX Cloud
If you are using DGX Cloud, you can easily use it to run CUDA-Q applications. While submitting jobs to DGX Cloud directly from within CUDA-Q is not (yet) supported, you can use the NGC CLI to launch and interact with workloads in DGX Cloud. The following sections detail how to do that, and how to connect JupyterLab and/or VS Code to a running CUDA-Q job in DGX Cloud.
Get Started
To get started with DGX Cloud, you can request access here. Once you have access, sign in to your account, and generate an API key. Install the NGC CLI and configure it with
ngc config set
entering the API key you just generated when prompted, and configure other settings as appropriate.
Note
The rest of this section assumes you have CLI version 3.33.0. If you have an older version installed, you can upgrade to the latest version using the command
ngc version upgrade 3.33.0
See also the NGC CLI documentation for more information about available commands.
You can see all information about available compute resources and ace instances with the command
ngc base-command ace list
Confirm that you can submit a job with the command
ngc base-command job run \
  --name Job-001 --total-runtime 60s \
  --image nvcr.io/nvidia/nightly/cuda-quantum:cu12-latest --result /results \
  --ace <ace_name> --instance <instance_name> \
  --commandline 'echo "Hello from DGX Cloud!"'
replacing <ace_name> and <instance_name> with the name of the ace and instance you want
to execute the job on.
You should now see that job listed when you run the command
ngc base-command job list
Once it has completed you can download the job results using the command
ngc base-command result download <job_id>
replacing <job_id> with the id of the job you just submitted.
You should see a new folder named <job_id> with the job log that contains
the output “Hello from DGX Cloud!”.
For more information about how to use the NGC CLI to interact with DGX Cloud, we refer to the NGC CLI documentation.
Use JupyterLab
Once you can run jobs on DGX Cloud, you can launch an interactive job to use CUDA-Q with JupyterLab running on DGX Cloud:
ngc base-command job run \
  --name Job-interactive-001 --total-runtime 600s \
  --image nvcr.io/nvidia/nightly/cuda-quantum:cu12-latest --result /results \
  --ace <ace_name> --instance <instance_name> \
  --port 8888 --commandline 'jupyter-lab-setup <my-custom-token> --port=8888'
Replace <my-custom-token> in the command above with a custom token that you can freely choose.
You will use this token to authenticate with JupyterLab;
Go to the job portal, click on the job you just launched, and click on the link
under ”URL/Hostname” in Service Mapped Ports.
Note
It may take a couple of minutes for DGX Cloud to launch and for the URL to become active, even after it appears in the Service Mapped Ports section; if you encounter a “404: Not Found” error, be patient and try again in a couple of minutes.
Once this URL opens, you should see the JupyterLab authentication page; enter the token you selected above to get access to the running CUDA-Q container. On the left you should see a folder with tutorials. Happy coding!
Use VS Code
Once you can run jobs on DGX Cloud, you can launch an interactive job to use CUDA-Q with a local installation of VS Code, or the VS Code Web UI, running on DGX Cloud:
ngc base-command job run \
  --name Job-interactive-001 --total-runtime 600s \
  --image nvcr.io/nvidia/nightly/cuda-quantum:cu12-latest --result /results \
  --ace <ace_name> --instance <instance_name> \
  --commandline 'vscode-setup tunnel --name cuda-quantum-dgx --accept-server-license-terms'
Go to the job portal, click on the job you just launched, and select the “Log”
tab. Once the job is running, you should see instructions there for how to connect to the device the job is running on.
These instructions include a link to open and the code to enter on that page; follow the instructions to authenticate.
Once you have authenticated, you can either
open VS Code in a web browser,
or connect a local installation of VS Code.
To connect a local installation of VS Code, make sure you have the
Remote - Tunnels extension installed,
then open the Command Palette with Ctrl+Shift+P, enter “Remote Tunnels: Connect to Tunnel”,
and enter cuda-quantum-remote. After the window reloaded, enter “File: Open Folder” in the Command Palette
to open the /home/cudaq/ folder.
You should see a pop up asking if you want to install the recommended extensions. Selecting to install them will configure VS Code with extensions for working with C++, Python, and Jupyter. You can always see the list of recommended extensions that aren’t installed yet by clicking on the “Extensions” icon in the sidebar and navigating to the “Recommended” tab.
If you enter “View: Show Explorer” in the Command Palette, you should see a folder with tutorials and examples to help you get started. Take a look at Next Steps to dive into CUDA-Q development.
Additional CUDA Tools
CUDA-Q makes use of GPU-acceleration in certain backends and components. Depending on how you installed CUDA-Q, you may need to install certain CUDA libraries separately to take advantage of these.
Installation via PyPI
If you installed CUDA-Q via PyPI, please follow the installation instructions there to install the necessary CUDA dependencies.
Installation In Container Images
If you are using the CUDA-Q container image, the image already contains all necessary runtime libraries to use all CUDA-Q components. To take advantage of GPU-acceleration, make sure
to enable GPU support when you launch the container, that is pass the --gpus all flag when launching
the container with Docker and the --nv flag when launching the container with Singularity.
Note that the image does not contain all development dependencies for CUDA, such as, for example the nvcc compiler. You can install all CUDA development dependencies by running the command
sudo apt-get install cuda-toolkit-12.0
inside the container. Make sure the toolkit version you install matches the CUDA runtime installation in the container.
Most Python packages that use GPU-acceleration, such as for example CuPy, require an existing CUDA installation.
After installing the cuda-toolkit-12.0 you can install CuPy for CUDA 12 with the command
python3 -m pip install cupy-cuda12x
Installing Pre-built Binaries
If you installed pre-built binaries for CUDA-Q, you will need to install the necessary CUDA runtime libraries to use GPU-acceleration in CUDA-Q. If you prefer to only install the minimal set of runtime libraries, the following commands, for example, install the necessary packages for RHEL 8:
CUDA_VERSION=${CUDA_VERSION:-12.6}
CUDA_DOWNLOAD_URL=https://developer.download.nvidia.com/compute/cuda/repos
# Go to the url above, set the variables below to a suitable distribution
# and subfolder for your platform, and uncomment the line below.
# DISTRIBUTION=rhel8 CUDA_ARCH_FOLDER=x86_64

version_suffix=$(echo ${CUDA_VERSION} | tr . -)
dnf config-manager --add-repo "${CUDA_DOWNLOAD_URL}/${DISTRIBUTION}/${CUDA_ARCH_FOLDER}/cuda-${DISTRIBUTION}.repo"
dnf install -y --nobest --setopt=install_weak_deps=False \
    cuda-cudart-${version_suffix} \
    cuda-nvrtc-${version_suffix} \
    libcusolver-${version_suffix} \
    libcusparse-${version_suffix} \
    libcublas-${version_suffix} \
    libcurand-${version_suffix}
if [ $(echo ${CUDA_VERSION} | cut -d . -f1) -gt 11 ]; then
    dnf install -y --nobest --setopt=install_weak_deps=False \
        libnvjitlink-${version_suffix}
fi
More detailed instructions for your platform can be found in the online documentation
linked for that CUDA version.
Please make sure to install CUDA version 12.0 or newer, and confirm that your
GPU driver supports that version.
While the above packages are sufficient to use GPU-acceleration within CUDA-Q,
we recommend installing the complete CUDA toolkit (cuda-toolkit-12-0) that also
includes the nvcc compiler. A separate CUDA-Q installer is available for CUDA 12,
built against version 12.6, and for CUDA 13, built against version 13.0.
Distributed Computing with MPI
CUDA-Q supports the Message Passing Interface (MPI) parallelism via a plugin interface. It is possible to activate or replace such an MPI plugin without re-installing or re-compiling CUDA-Q. MPI calls via CUDA-Q API for C++ and Python will be delegated to the currently activated plugin at runtime.
The CUDA-Q Docker image is shipped with a pre-built MPI plugin based on an optimized OpenMPI installation included in the image. No action is required to use this plugin. We recommend using this plugin unless the container host has an existing MPI implementation other than OpenMPI.
If you are not using the Docker image, or are using the image on a system that has a vendor-optimized MPI library pre-installed, please follow the instructions in the “Custom MPI Support” tab to enable MPI support.
If you are not using the Docker image, or are using the image on a system that has a vendor-optimized MPI library pre-installed, CUDA-Q can be configured to use the local MPI installation by manually activating a suitable plugin post-installation. To do so,
Make sure the environment variable
CUDA_QUANTUM_PATHpoints to the CUDA-Q installation directory. If you installed CUDA-Q using theinstaller <install-prebuilt-binaries>, or if you are using the CUDA-Q container image, this variable should already be defined. If you installed the CUDA-QPython wheels <install-python-wheels>, set this variable to the directory listed under “Location” when you run the commandpip show cudaq.Set the environment variable
MPI_PATHto the location of your MPI installation. In particular,${MPI_PATH}/includeis expected to contain thempi.hheader and${MPI_PATH}/lib64or${MPI_PATH}/libis expected to containlibmpi.so.Execute the following command to complete the activation:
bash $CUDA_QUANTUM_PATH/distributed_interfaces/activate_custom_mpi.sh
Note
HPC data centers often have a vendor-optimized MPI library pre-installed on their system. If you are using our container images, installing that MPI implementation in the container and manually activating the plugin following the steps above ensure the best performance, and guarantee compatibility when MPI injection into a container occurs.
Manually activating an MPI plugin replaces any existing plugin; After the initial activation, the newly built
libcudaq_distributed_interface_mpi.so in the installation directory will subsequently always be used to
handle CUDA-Q MPI calls.
Note
Executing the activation script from the CUDA-Q installation directory requires write permissions to that directory.
If you do not have the necessary permissions, copy the distributed_interfaces sub-directory to a local location and execute the
activation script from there.
In this scenario, since the activated plugin (libcudaq_distributed_interface_mpi.so) is outside the CUDA-Q installation,
you must set the environment variable $CUDAQ_MPI_COMM_LIB to the path of that shared library.
This is done automatically when executing that activation script, but you may wish to persist that environment variable
between bash sessions, e.g., by adding it to the .bashrc file.
Updating CUDA-Q
If you installed the CUDA-Q Python wheels, you can update to the latest release by running the command
python3 -m pip install --upgrade cudaq
Note
Please check if you have an existing installation of the cuda-quantum,
cudaq-quantum-cu12, or cuda-quantum-cu13 package,
and uninstall it prior to installing cudaq. The cudaq package supersedes the
cuda-quantum package and will install a suitable binary distribution (either
cuda-quantum-cu12 or cuda-quantum-cu13) for your system. Multiple versions
of a CUDA-Q binary distribution will conflict with each other and not work properly.
If you previously installed the CUDA-Q pre-built binaries, you should first uninstall your current CUDA-Q installation before installing the new version using the installer. To uninstall your current CUDA-Q version, run the command
sudo bash "${CUDA_QUANTUM_PATH}/uninstall.sh" -y
The uninstall.sh script is generated during installation, and will remove all files
and folders that were created as part of the installation, whether they were modified
in the meantime or not. It does not remove any additional files that existed prior
to the installation or that you have added to the installation location since then.
You can then download and install the new version of CUDA-Q following the
instructions above.
Dependencies and Compatibility
CUDA-Q can be used to compile and run quantum programs on a CPU-only system, but a GPU is highly recommended and necessary to use the GPU-based simulators, see also CUDA-Q Circuit Simulation Backends.
The supported CPUs include x86_64 (x86-64-v3 architecture and newer) and ARM64 (ARM v8-A architecture and newer). On macOS, only ARM64 (Apple silicon) is supported.
Note
Some of the components included in the CUDA-Q Python wheels depend on an existing CUDA installation on your system. For more information about installing the CUDA-Q Python wheels, take a look at this section.
The following table summarizes the required components.
CPU architectures |
x86_64, ARM64 |
Operating systems |
Linux, macOS (ARM64/Apple silicon only), Windows via Windows Subsystem for Linux 2 (WSL2) |
Tested Distributions |
CentOS 8; Debian 11, 12; Fedora 41; OpenSUSE/SLED/SLES 15.5, 15.6; RHEL 8, 9; Rocky 8, 9; Ubuntu 22.04, 24.04 |
Python versions |
3.11+ |
GPU Architectures |
Turing, Ampere, Ada, Hopper, Blackwell (Blackwell supported for CUDA 13.x only) |
NVIDIA GPU with Compute Capability |
7.5+ |
CUDA |
|
Detailed information about supported drivers for different CUDA versions and be found here. For more information on GPU forward capabilities, please refer to this page.
Note
Tegra devices (Jetson) are not supported in CUDA-Q at this time.
For more information, please refer to Binary Compatibility documentation.
Next Steps
You can now compile and/or run the C++ and Python examples using the terminal.
To open a terminal in VS Code, open the Command Palette with Ctrl+Shift+P and
enter “View: Show Terminal”.
The CUDA-Q image contains a folder with examples and tutorials in the /home/cudaq directory.
These examples are provided to get you started with CUDA-Q and understanding
the programming and execution model.
If you are not using a container image, you can find these examples on our
GitHub repository.
Let’s start by running a simple program to validate your installation. The samples contain an implementation of a Bernstein-Vazirani algorithm. To run the example, execute the command:
python examples/python/bernstein_vazirani.py --size 5
nvq++ examples/cpp/algorithms/bernstein_vazirani.cpp && ./a.out
This will execute the program on the default simulator, which will use GPU-acceleration if a suitable GPU has been detected. To confirm that the GPU acceleration works, you can increase the size of the secret string, and pass the target as a command line argument:
python examples/python/bernstein_vazirani.py --size 25 --target nvidia
nvq++ examples/cpp/algorithms/bernstein_vazirani.cpp -DSIZE=25 --target nvidia && ./a.out
This program should complete fairly quickly. Depending on the available memory on your GPU,
you can set the size of the secret string to up to 28-32 when running on the nvidia target.
Note
If you get an error that the CUDA driver version is insufficient or no GPU has been detected,
check that you have enabled GPU support when launching the container by passing the --gpus all flag
(for Docker) or the --nv flag (for Singularity).
If you are not running a container, you can execute the command nvidia-smi to confirm your setup;
if the command is unknown or fails, you do not have a GPU or do not have a driver installed. If the command
succeeds, please confirm that your CUDA and driver version matches the
supported versions.
Let’s compare that to using only your CPU:
python examples/python/bernstein_vazirani.py --size 25 --target qpp-cpu
nvq++ examples/cpp/algorithms/bernstein_vazirani.cpp -DSIZE=25 --target qpp-cpu && ./a.out
When you execute this command, the program simply seems to hang; that is because it takes
a long time for the CPU-only backend to simulate 28+ qubits! Cancel the execution with Ctrl+C.
You are now all set to start developing quantum applications using CUDA-Q! Please proceed to Basics for an introduction to the fundamental features of CUDA-Q.